Rave Alert User Profile Setup
These instructions explain how to set up your Rave user profile to receive text, voice and email alerts.
Procedure
To begin, access your Rave profile at www.getrave.com.
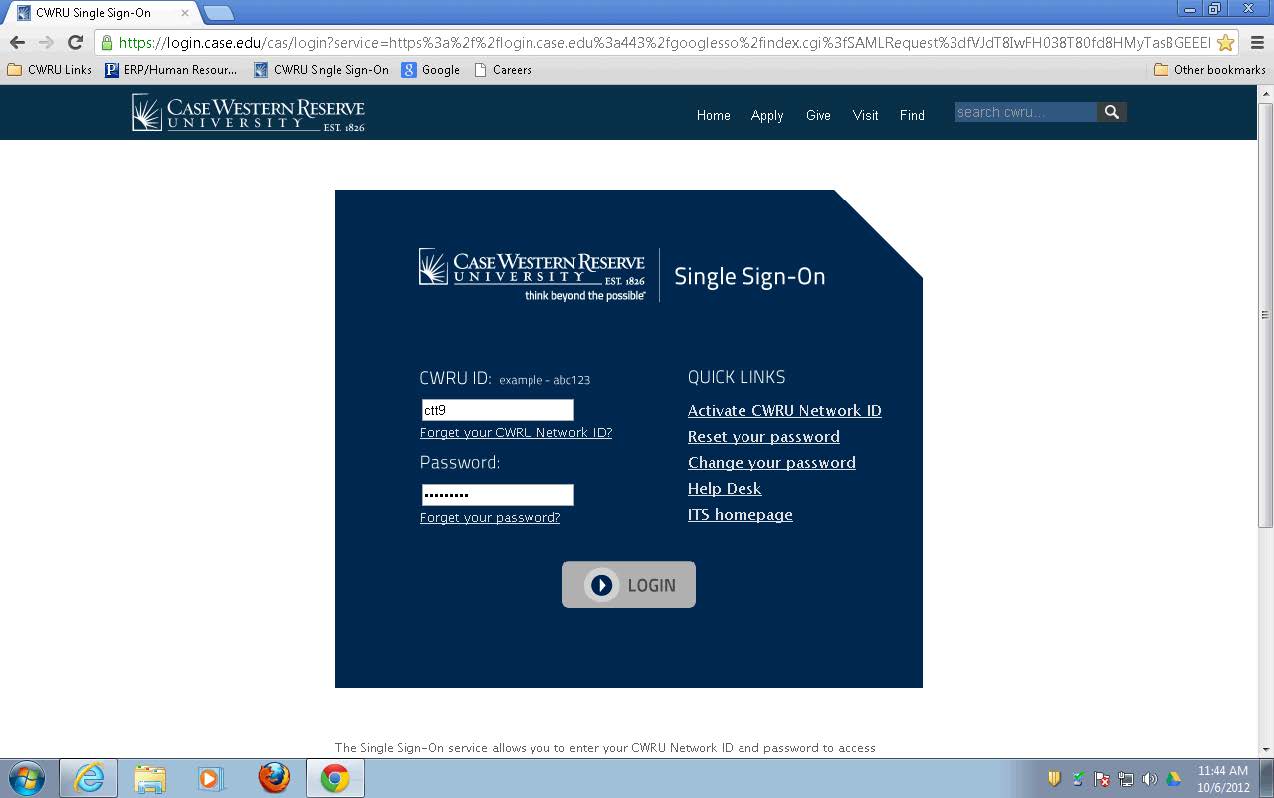
- From the Single Sign-On page, enter your CWRU Network ID and password and then click the Login button.
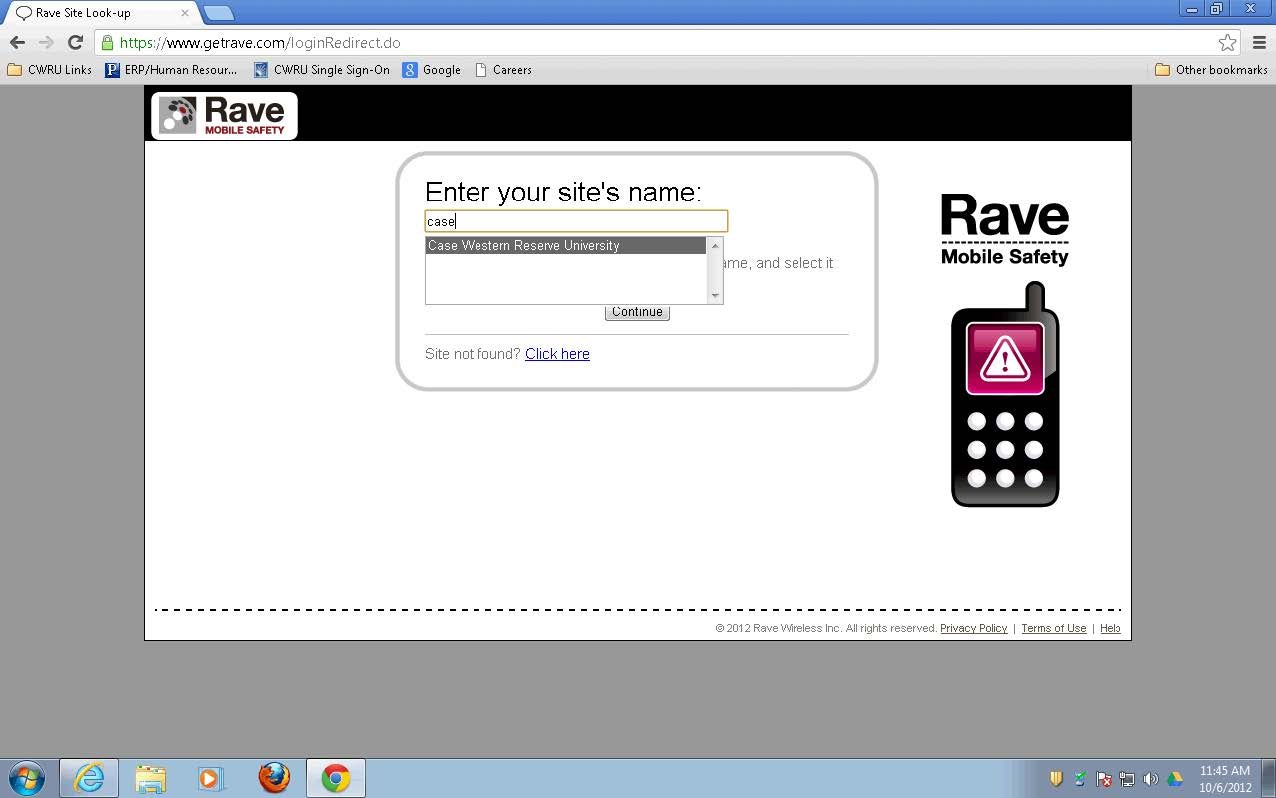
- If the Rave Mobile Safety log in page appears, type in "case" to bring up CWRU on the drop down list.
- Click the Case Western Reserve University menu entry to select it.
- Click the Continue button.
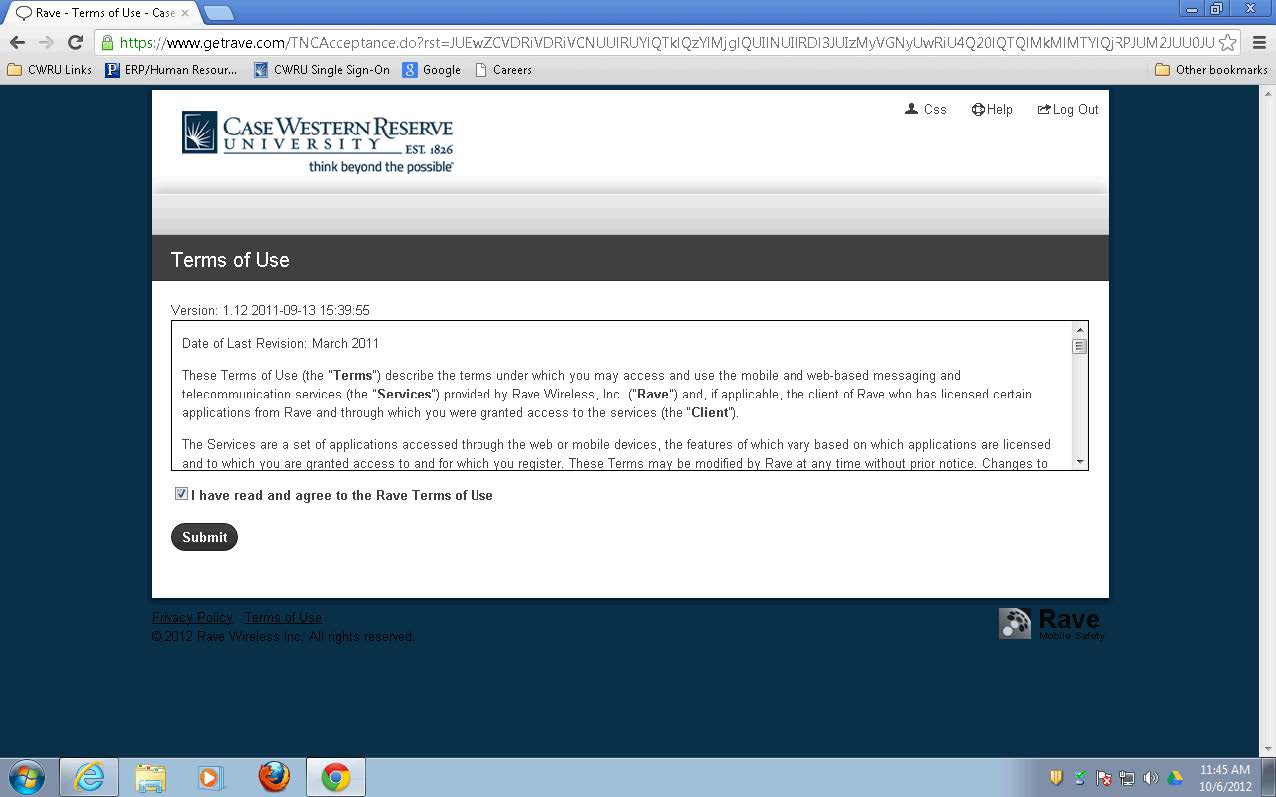
- The Terms of Use page appears. You can use the scroll bar to the right of the text to view the service agreement information.
- Click the I have read and agree to the Rave Terms of Use check box to indicate that you agree to the Rave terms of service.
- Click the Submit button.
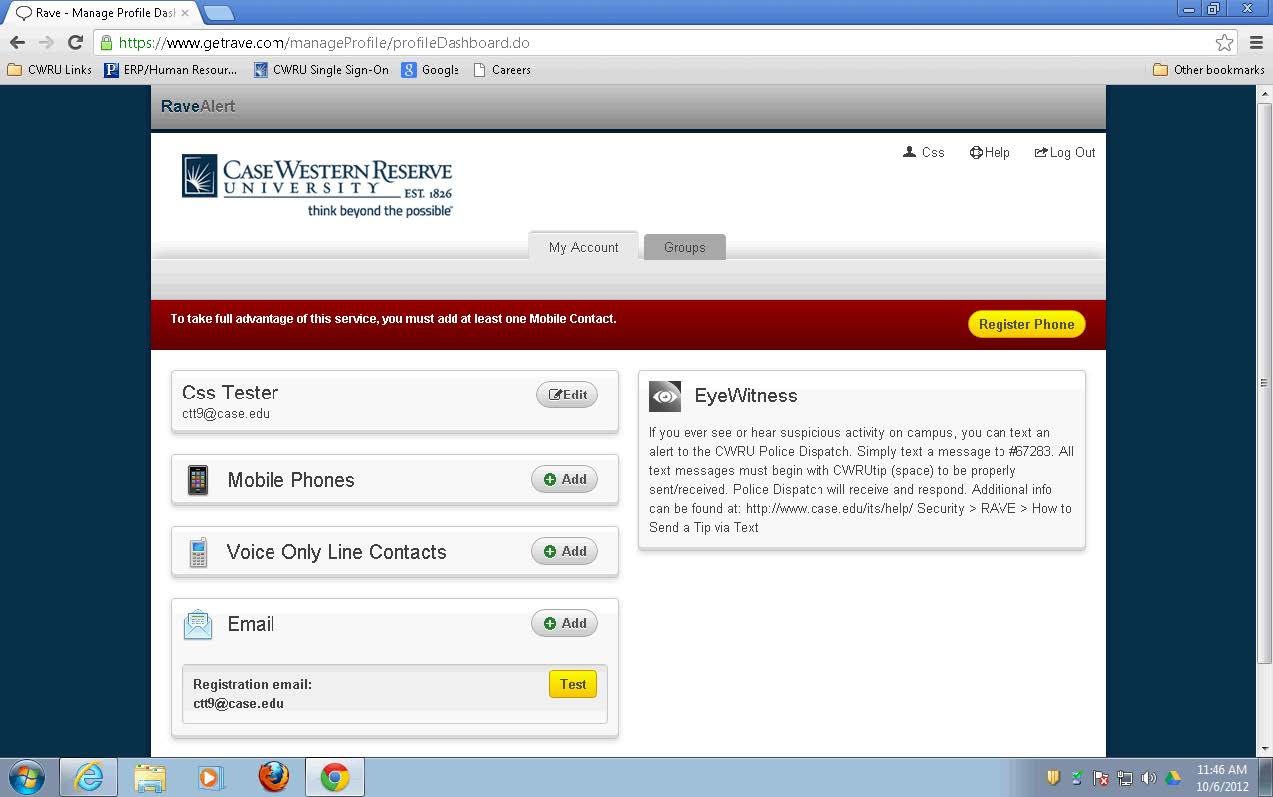
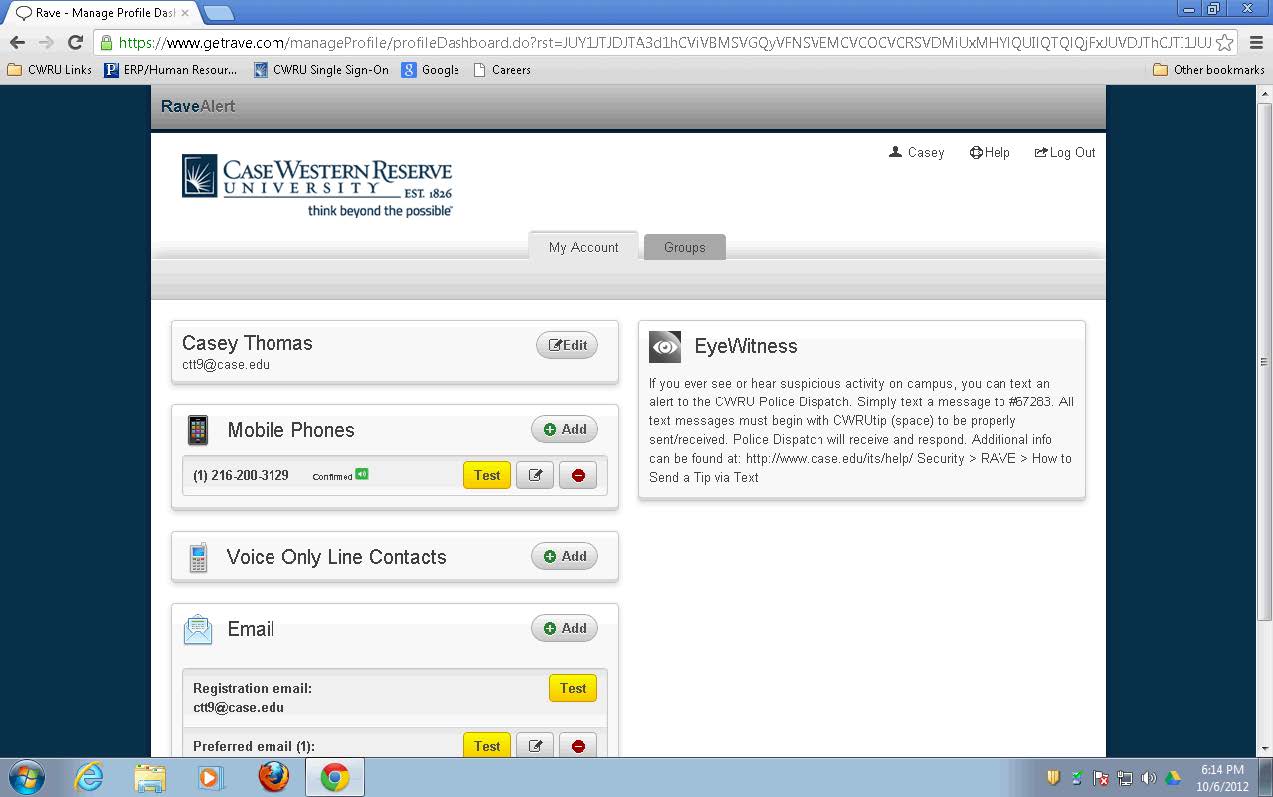
- Your RaveAlert profile page will appear. You can edit profile details from the My Account tab.
- Click the Edit button next to your name to begin.
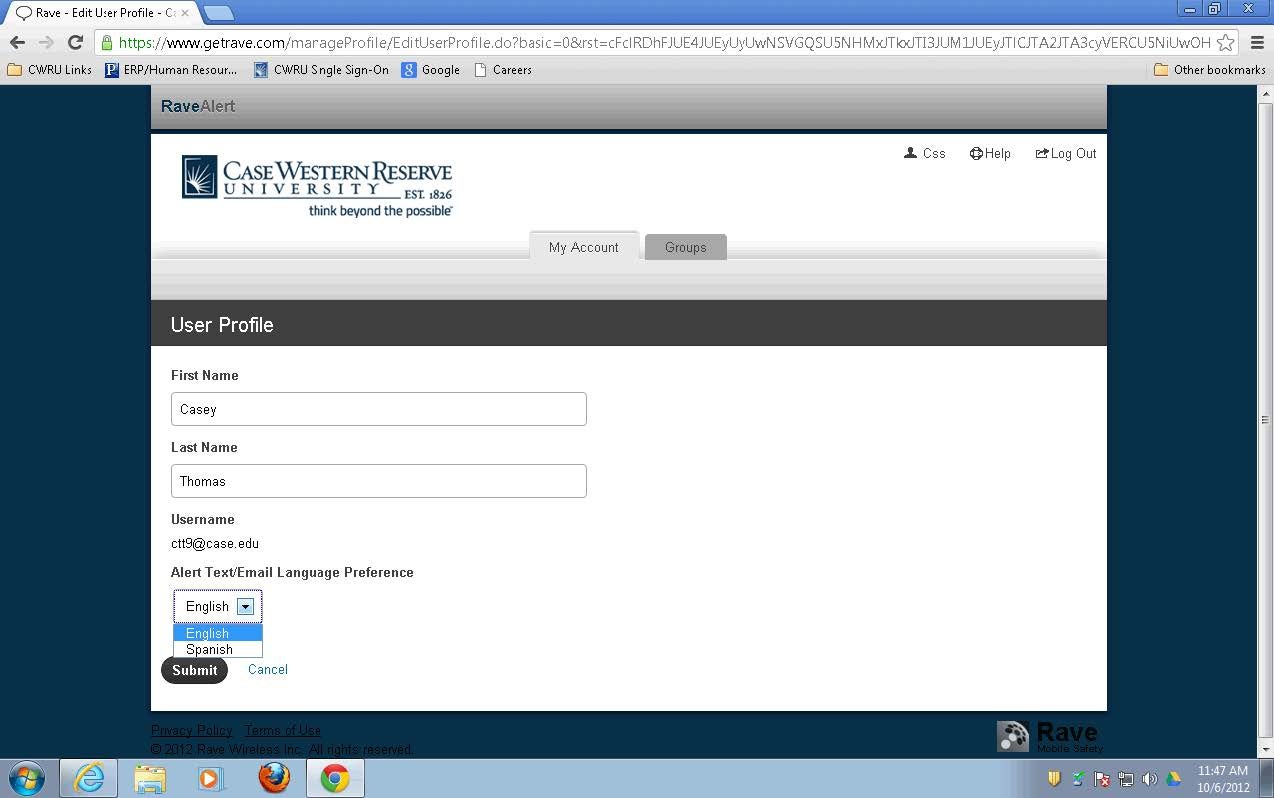
- From the User Profile page you can edit the First/Last Name fields and select either English or Spanish as your preferred alert language from the drop down list.
- When finished, click the Submit button.

- You will receive a banner message stating: Success: User Profile successfully updated.
- The Rave system will accept up to 3 mobile phone numbers to which Short Message Service (SMS) text alerts can be sent.
- If you have not previously registered a mobile phone, you will receive the following banner message: To take full advantage of this service, you must add at least one Mobile Contact.
- Click the Register Phone button that appears on the right of the banner message.
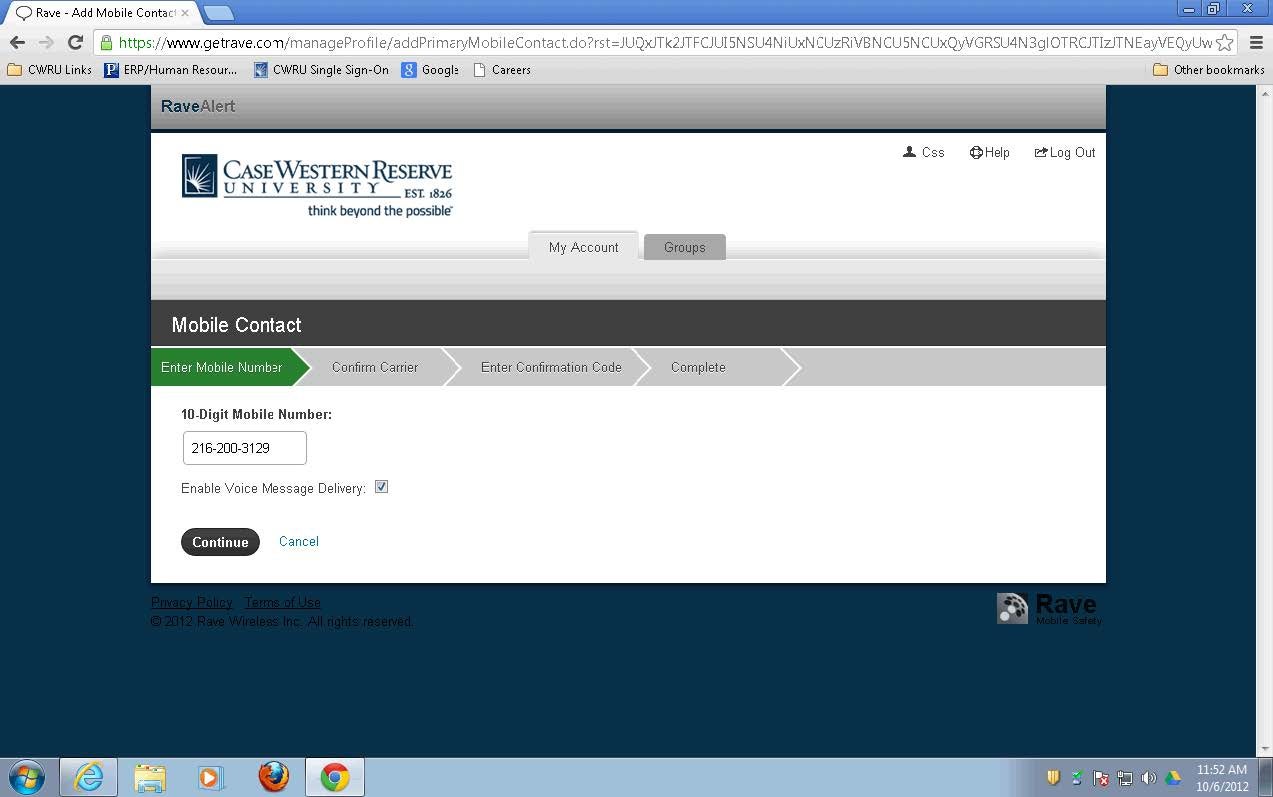
- Enter your 10-Digit Mobile Number in the field provided.
- The Enable Voice Message Delivery option is selected by default and will allow you receive voice message alerts in addition to text messages.
- If you wish to receive text messages only, then click the check box to deselect this option.
- Click the Continue button.
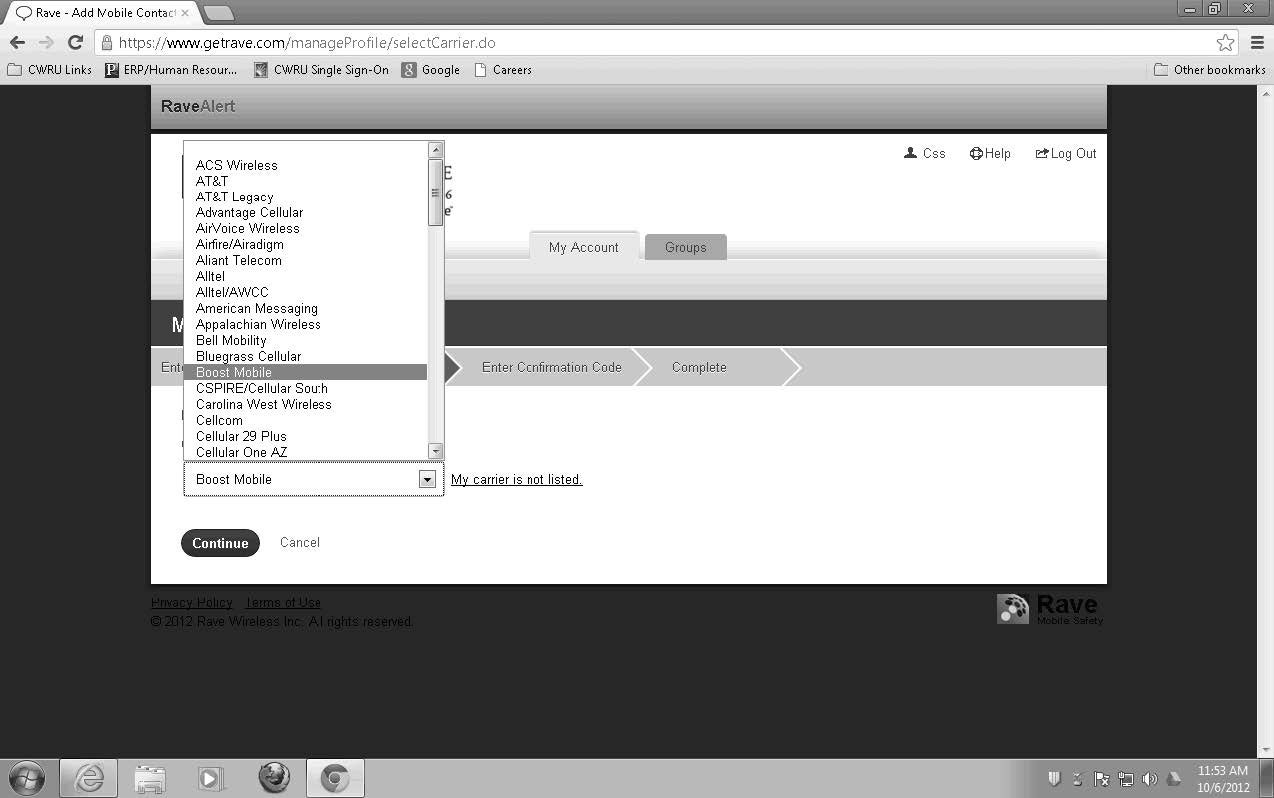
- Select your cell provider from the Confirm your carrier drop down list.
- Click the Continue button when finished.
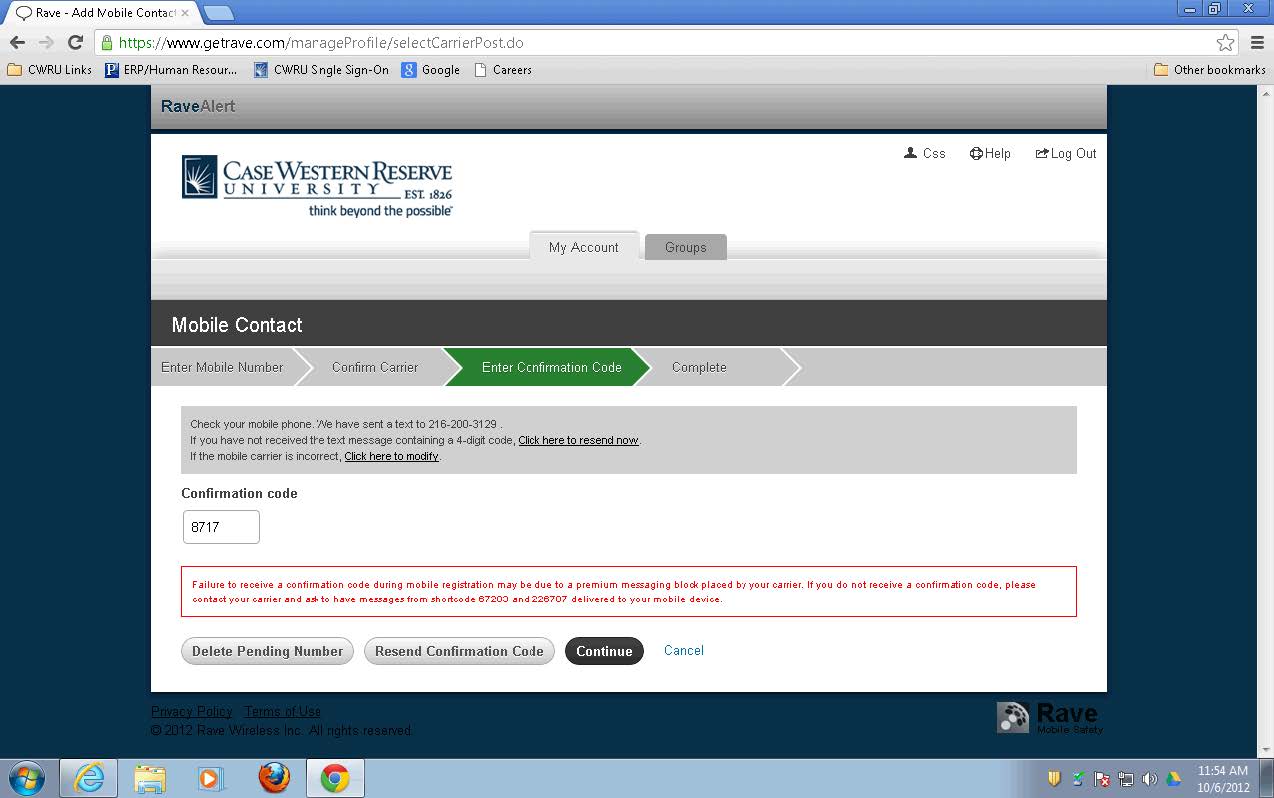
- Check your mobile phone for a text message from 226787 or 67283:
- cwru: Your confirmation code is 8717. Reply w/ Help for Help, Stop to Cancel. Msg and data rates may apply. Info: getrave.com.
- Enter your Confirmation code into the field provided.
Note: Failure to receive a confirmation code during mobile registration may be due to a premium messaging block placed by your carrier. If you do not receive the code, please contact your carrier and ask to have messages from short codes 67283 and 226787 delivered to your mobile device.
- You can use the Resend Confirmation Code button to try again (if needed).
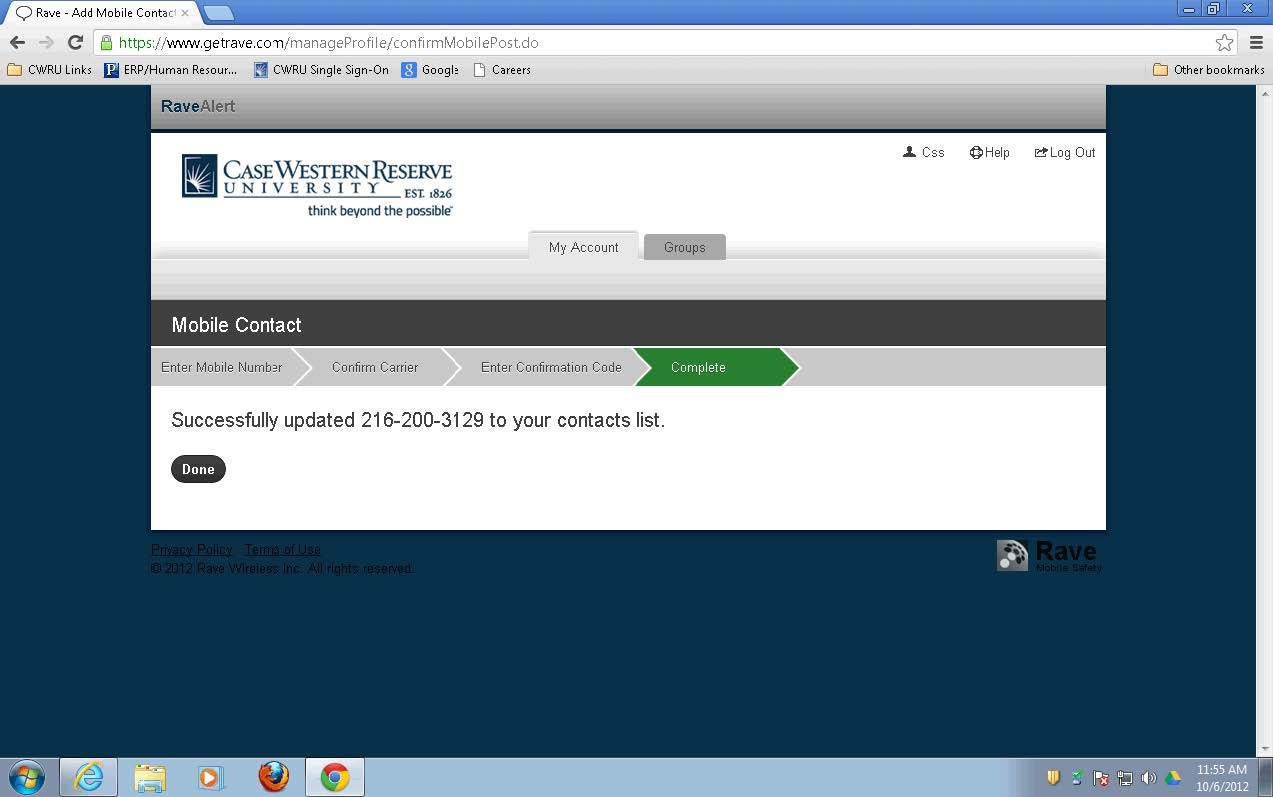
- When your mobile number has been successfully added to the contacts list, click the Done button.
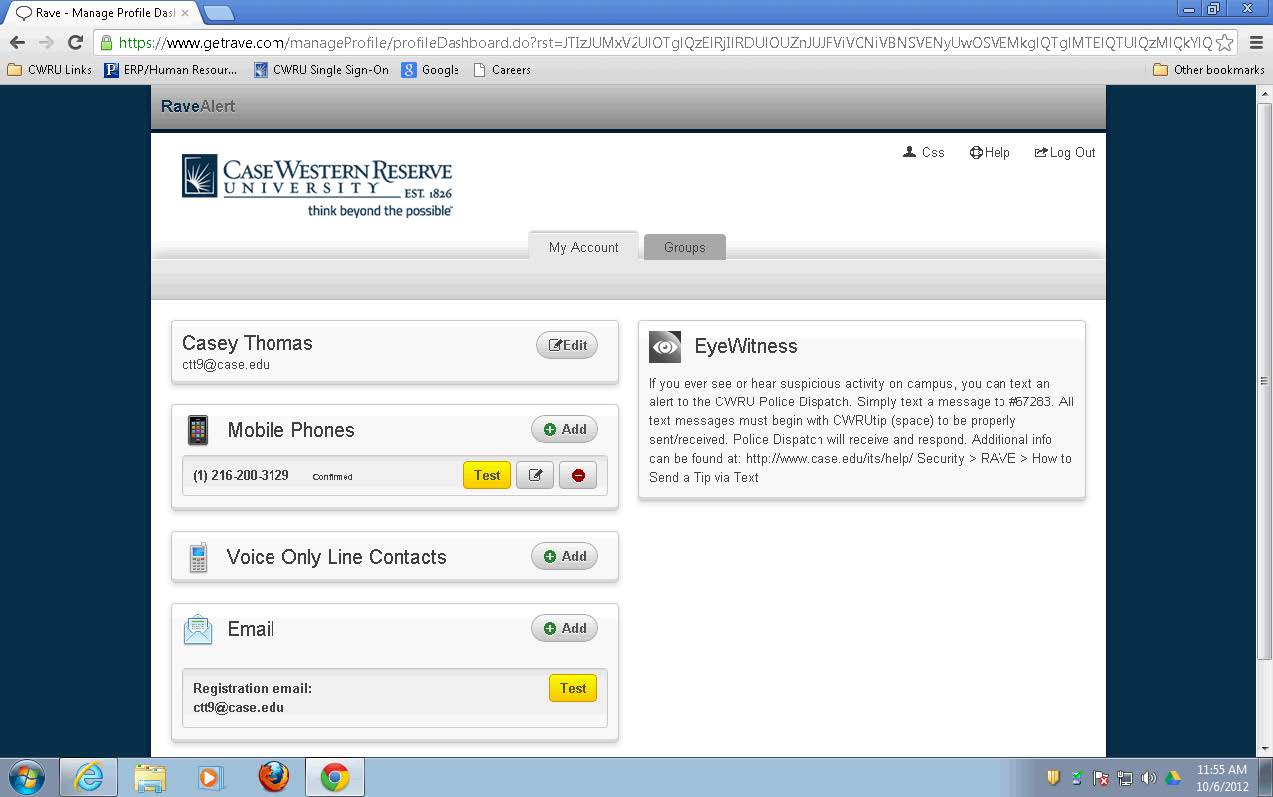
- Your mobile phone number will now show as Confirmed on the My Account page.
- Use the +Add button to add more up to 2 more numbers.
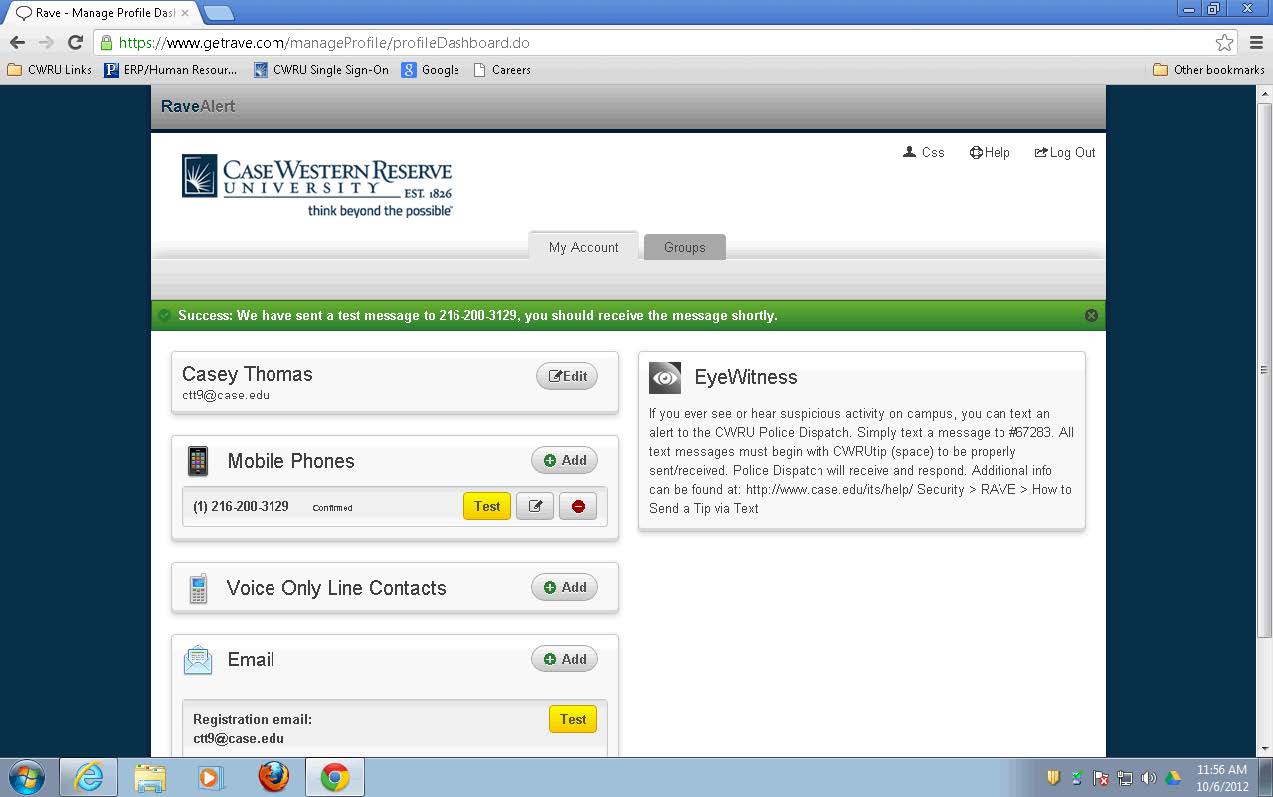
- Use the Test button to generate a test text message from the Rave system.
- Use the Edit button to edit existing numbers.
- Use the Delete button to remove a number.
Note for Students: If you do not have a cellular contact number, you can enter 999-999-9999.
- You must use the Cancel button from the confirmation screen to skip the confirmation process since there is no number to verify.
- Even though the 999-999-9999 number is not confirmed, it will still clear the pop-up message you receive when logging in to SIS.
- You can use the Voice Only Line Contact function to add a contact number to receive Voice Messages Only.
- Click the +Add button.

- Enter the Phone Number in field provided.
- Click the Save button.
Note: There is no confirmation process for Voice Only Line Contact numbers.

- Rave will accept up to 3 email addresses. We recommend that you add at least one address that is not affiliated with CWRU.
Note: Please do not use CWRU alias email addresses for this purpose.
- The Registration email field displays your CWRU email address.
- Click the +Add button.
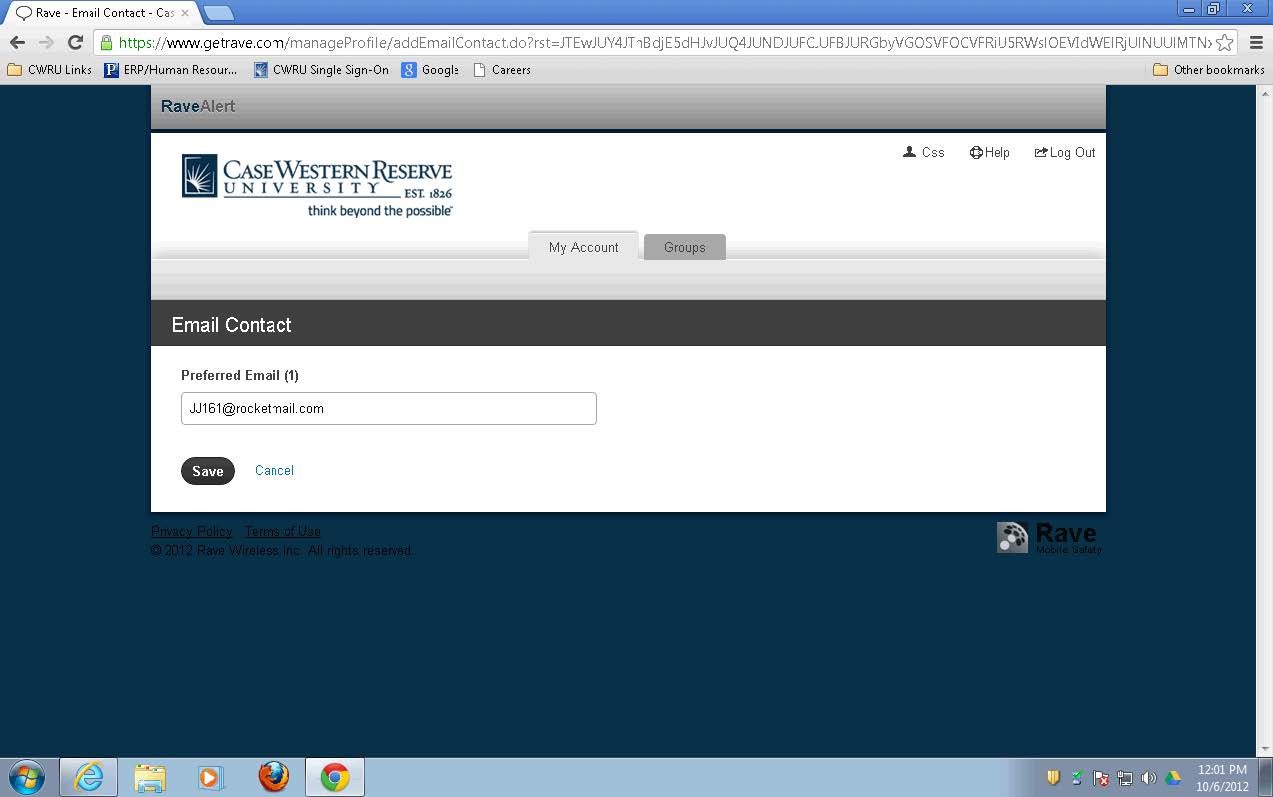
- Enter your off-campus email address into the Preferred Email contact field.
- Click the Save button.
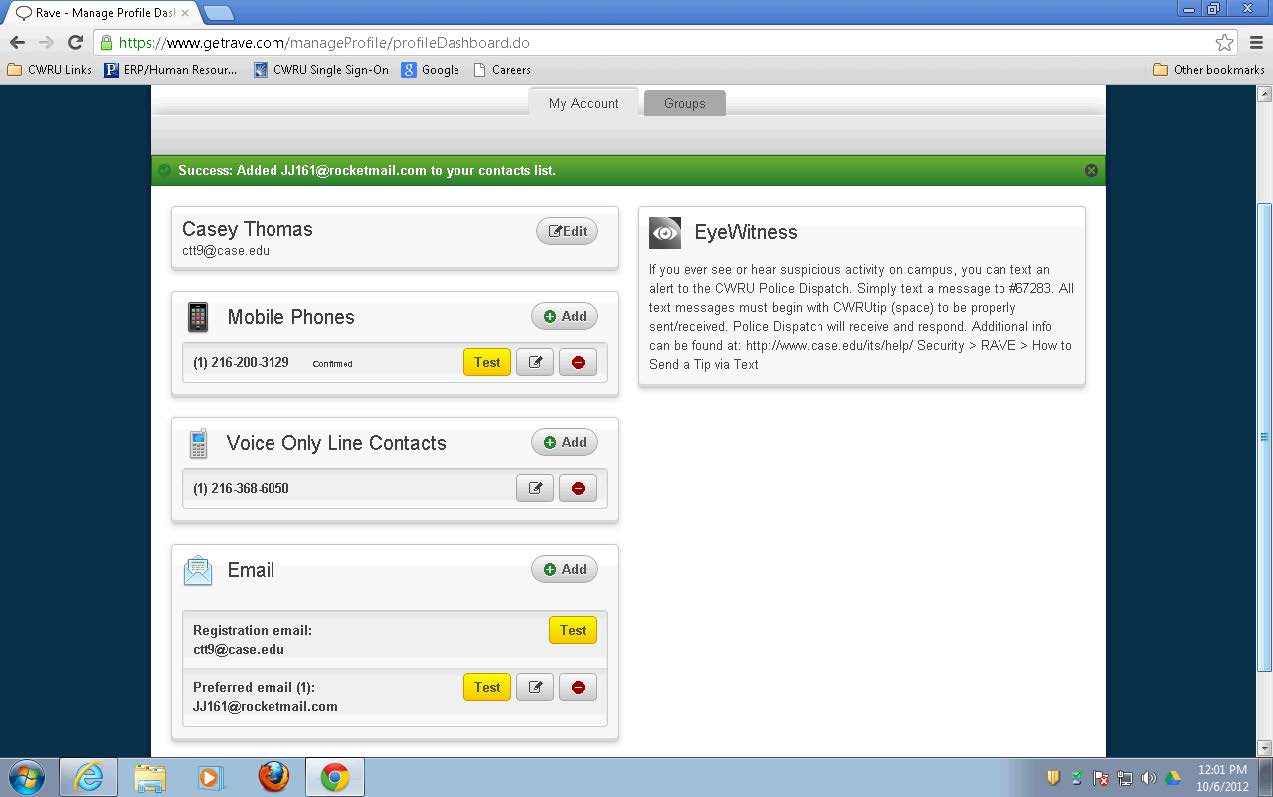
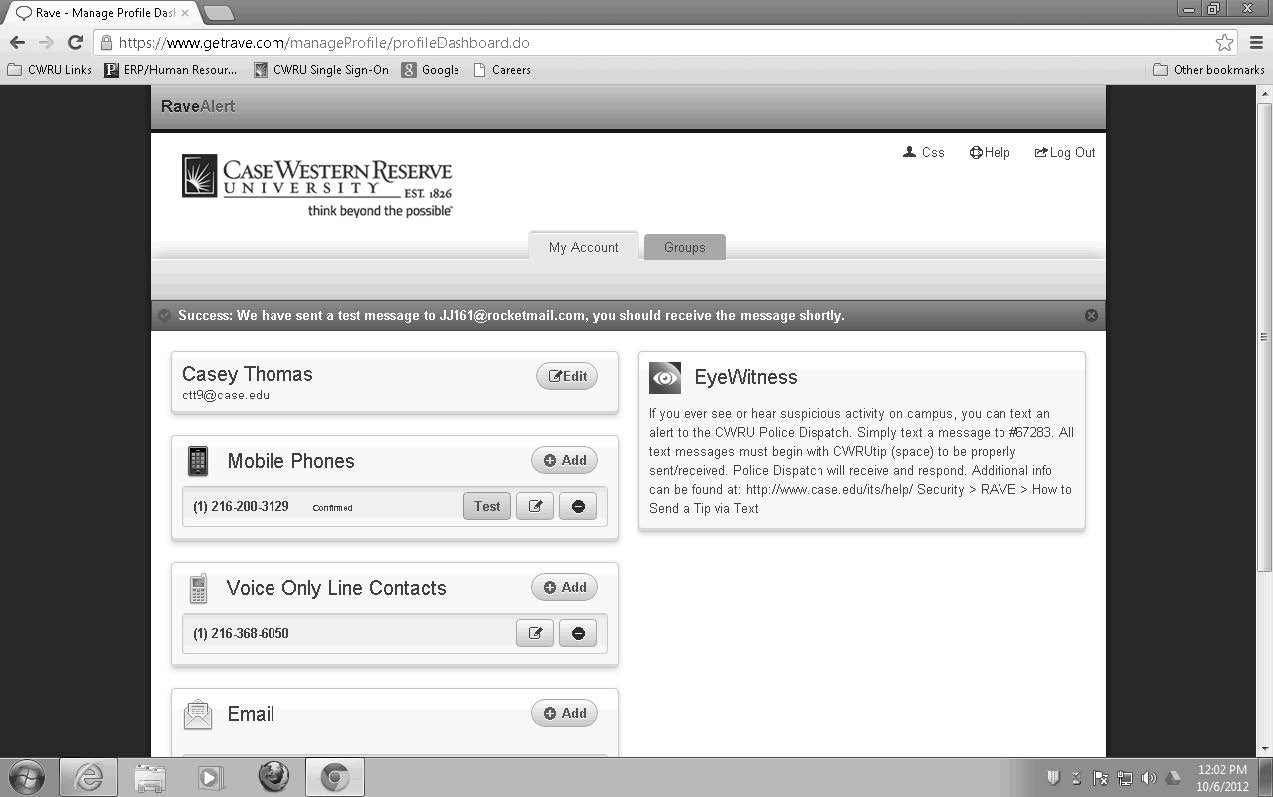
- You can use the Test button to send a test message to your Registration or Preferred email accounts.
- Click the Edit button to edit an existing address.
- Click the Delete button to remove an existing address.
- Click the Log Out link to exit.
- End of Procedure.