The CHSU Simulation Center features a holographic anatomy classroom where students utilize HoloAnatomy® Software Suite developed by Case Western Reserve University (CWRU) with the Microsoft HoloLens 2.
The HoloAnatomy® Software was designed to study anatomy using holographs instead of traditional cadaver and dissection labs for learning. Each CHSU College of Osteopathic Medicine student has a HoloLens to study anatomy any time, any place. This elevated, educational experience allows medical students to delve deeper into the human anatomy and each body system.
"CHSU is proud to be one of the first universities in partnership with Case Western Reserve University to offer this innovative, anatomy education technology."
- CHSU College of Osteopathic Medicine
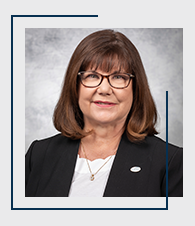
Leslie Catron, M.A.ED, BSN, RN, CHSE
Simulation Center Director
Clinical Instructor Faculty
California Health Sciences University
Clovis, CA
The Dean of the College of Osteopathic Medicine showed interest in holographic anatomy and after finding CWRU, I learned about HoloAnatomy® Software and the journey began.
A trip was planned to visit CWRU which was the turning point for CHSU and the development of our anatomy curriculum.
Within minutes of putting on the HoloLens and experiencing HoloAnatomy® Software by walking through the spinal column, we were wholeheartedly convinced the new College of Osteopathic Medicine would use this. In February 2019, our partnership with CWRU began with HoloAnatomy® Software training our simulation specialists to learn firsthand how CHSU would use the HoloLens in teaching.
Prospective students experienced an interactive demonstration and found HoloAnatomy® Software with the HoloLens was a compelling reason to choose CHSU for medical school.
Choosing to use HoloAnatomy® Software changed the course of construction for our simulation center. The university and College of Osteopathic Medicine decided to abandon a cadaver lab, which meant we would not need licensed personnel to oversee this area.
Hundreds of thousands of dollars were saved in this decision allowing for the adaption of other teaching equipment and tools. Instead of a cadaver lab, the center gained room for task trainers and a classroom.
Further, HoloAnatomy® Software on the HoloLens is portable and provides an opportunity for students to study outside the classroom. This impacted teaching when the college went remote in the Spring of 2020 during the Pandemic. We were still able to provide anatomy education off-site. In retrospect, not having HoloAnatomy® Software would have changed the course of providing medical education.
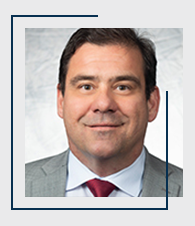
Dr. Boris Boyanovsky
Anatomy Faculty
Biomedical Education
California Health Sciences University
Clovis, CA
The ability of HoloAnatomy® Software to display 3D structures or holograms is extremely helpful in my role as a professor. One of the greatest challenges I face when designing my lectures is finding an adequate image or example to visualize what I will be talking about.
The Design Tool allows me to create whatever I want, making it easy to choose any particular bone, muscle, or even nerve and arrange it according to my needs.
The holographic model gives me the unique ability to show views and angles of structures usually unseen in a cadaver.
I was terrified the first time I saw HoloLens and HoloAnatomy® Software Suite. I just started my new position as anatomy faculty at the new CHSU medical school. I didn’t know how I was going to learn this new technology, create all the content in the Designer Tool in time for our incoming students, even though I visited and trained with the CWRU team. I had no choice, we committed to this modality and I had to do it. We met as a team, made plans, started slowly, and kept a steady pace. There was a learning curve, as with anything new.
I had everything I needed, excellent training, documentation, and customer support when I was stuck.
After a few days and several lectures later, I became proficient in developing content in HoloAnatomy® Software. I was using pedagogical features such as highlighting, custom labeling, transparency, positioning, and various scale of the holographic model to help my students see things easier and clearer. A few months later I was reflecting on my initial anxious feelings about trying something new, as with everything practice makes it perfect. Since I have had enough time to refine my sessions, I've created plenty of content and experimented with a variety of pedagogical tools.
I noticed in myself a gradual transition from nervousness to excitement.
My big concern at the time was, are the students going to like it? Are they going to have a problem that we are using a digital lab vs a traditional cadaver lab? I was still a little apprehensive. When students came back to campus and I was ready to use HoloAnatomy® Software with them for the first time, I was taken back by what I observed.
The students accepted the new modality like it is the most natural thing in the world to see a hologram. They did not have any problems learning anatomy in a digital lab using HoloAnatomy® Software as opposed to traditional cadaver lab dissections.
After using HoloAnatomy® Software, only 2% of our students are still interested in seeing cadavers.
I had previously had problems showing and creating an image of a structure I wanted to show in a specific way. HoloAnatomy® Software gave me this freedom. For example, if I want to show the innervation of the biceps brachii. I pull the skeleton, the brachial plexus, muscular continuum, and the muscle to show to the students.
This creates a visual imprint that they will not forget.
HoloAnatomy® Software makes it very easy. This is the best feature of HoloAnatomy® Software. It gives me the opportunity to create my own presentation and to show structures the way I am teaching them.
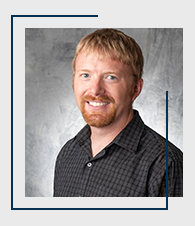
Thayer Merrit
Simulation Specialist
Mixed Reality
Biomedical Education
California Health Sciences University
Clovis, CA
Two weeks after I started my new position with CHSU in August 2019, a team of us headed to CWRU where we were trained on how to use the HoloAnatomy® Software. This took an edge off the question that everyone had on their mind ‘how do we do this?’. First, we started by learning the Designer Tool, an easy-to-use authoring platform, that gives you complete control and flexibility when creating your content. Our faculty learned some very useful pedagogical features such as highlighting, transparencies, custom labeling, different scales, positioning of the hologram, and more.
Next, we had a planning session where we discussed: What and how we want to present information to our students? What do they need to know? How do we train them? Upon our return, I worked very closely with our anatomy faculty developing the lessons for our students.
Our approach was to start from the back and move forward.
We were able to add custom labels and highlight anatomical objects that were important, position hologram according to the teaching needs and show anatomy that was just simply not possible to see in a traditional cadaver lab. I then focused on the process of setting up the holograms in our classrooms, I was surprised how simple and straightforward this process was
We dedicated a lot of time to ensure this would be a good experience for our students and for our faculty delivering.
On the first day of class, we needed to get the HoloLenses out to students, so we started issuing out the devices. We then suggested that students turn on their devices and follow the instructions on how to bring up the Start Menu and go immediately to the Tips App that Microsoft created within the HoloLens. The Microsoft Tips App is a fantastic way to get comfortable with the device.
In less than 15 minutes, students were ready to go and understand how buttons work. They felt very comfortable by the time we were ready to start our lesson. It was a very good experience for them.
In class, we learned how to anchor to ensure our models would be in the same place. I was using Mixed Reality Capture on my headset so that they could see what they should be seeing. For the most part, floating around and making sure everyone was on the same page worked out very well, and we did a quick lesson.
Ongoing, I am available to our students for the technical support they may have with the HoloLens device as well as any suggestions they are thinking of what might be a good application in the future.
We are getting a lot of good feedback, and being on the support side of it has been a lot of fun.
Learn more about CHSU and their use of HoloAnatomy® Software Suite here.


