PeopleSoft Financials Resources
Purpose:
This guide explains how to enter a travel expense report through Financials.
Procedure:
Before you get started, you will need your receipts, as well as any information regarding your trip that would be reimbursable. You would also need information that would be documented by your department or the university.
To begin, you must be logged on to PeopleSoft Financials 9.2. For further information for this process, please click here (hyperlink to instructions here)
- From the Main Menu, click the Employee Self Service link.
- Click the Travel and Expense Center link.
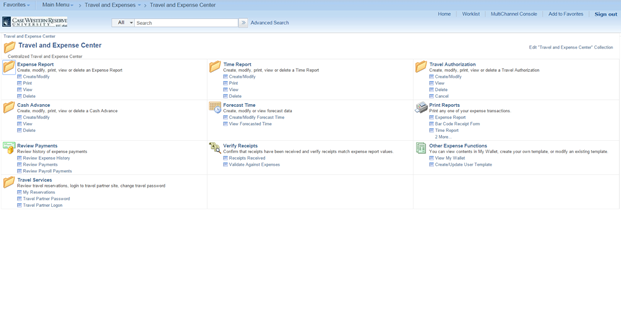
- Click the Expense Report link.
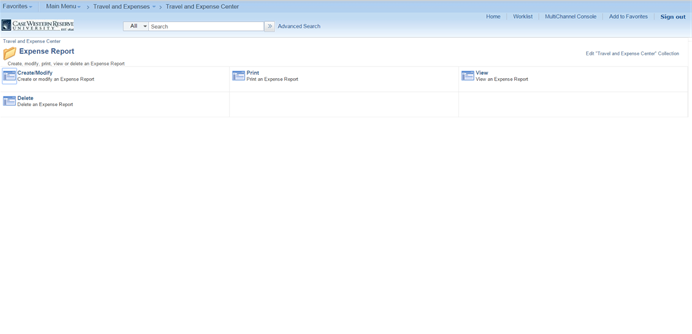
- Click the Create/Modify link.
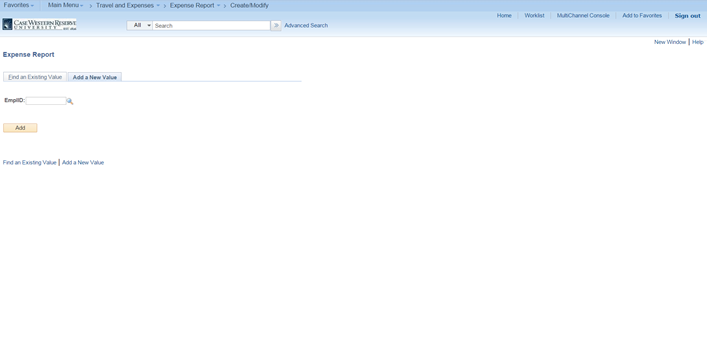
- The Expense Report Entry page appears. Click the Add a New Value link.
- Enter the Employee ID, or click on the Magnifying Glass to search by name. Click the Add button when finished.
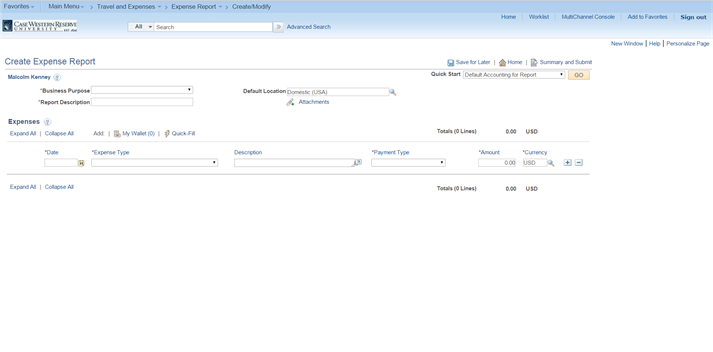
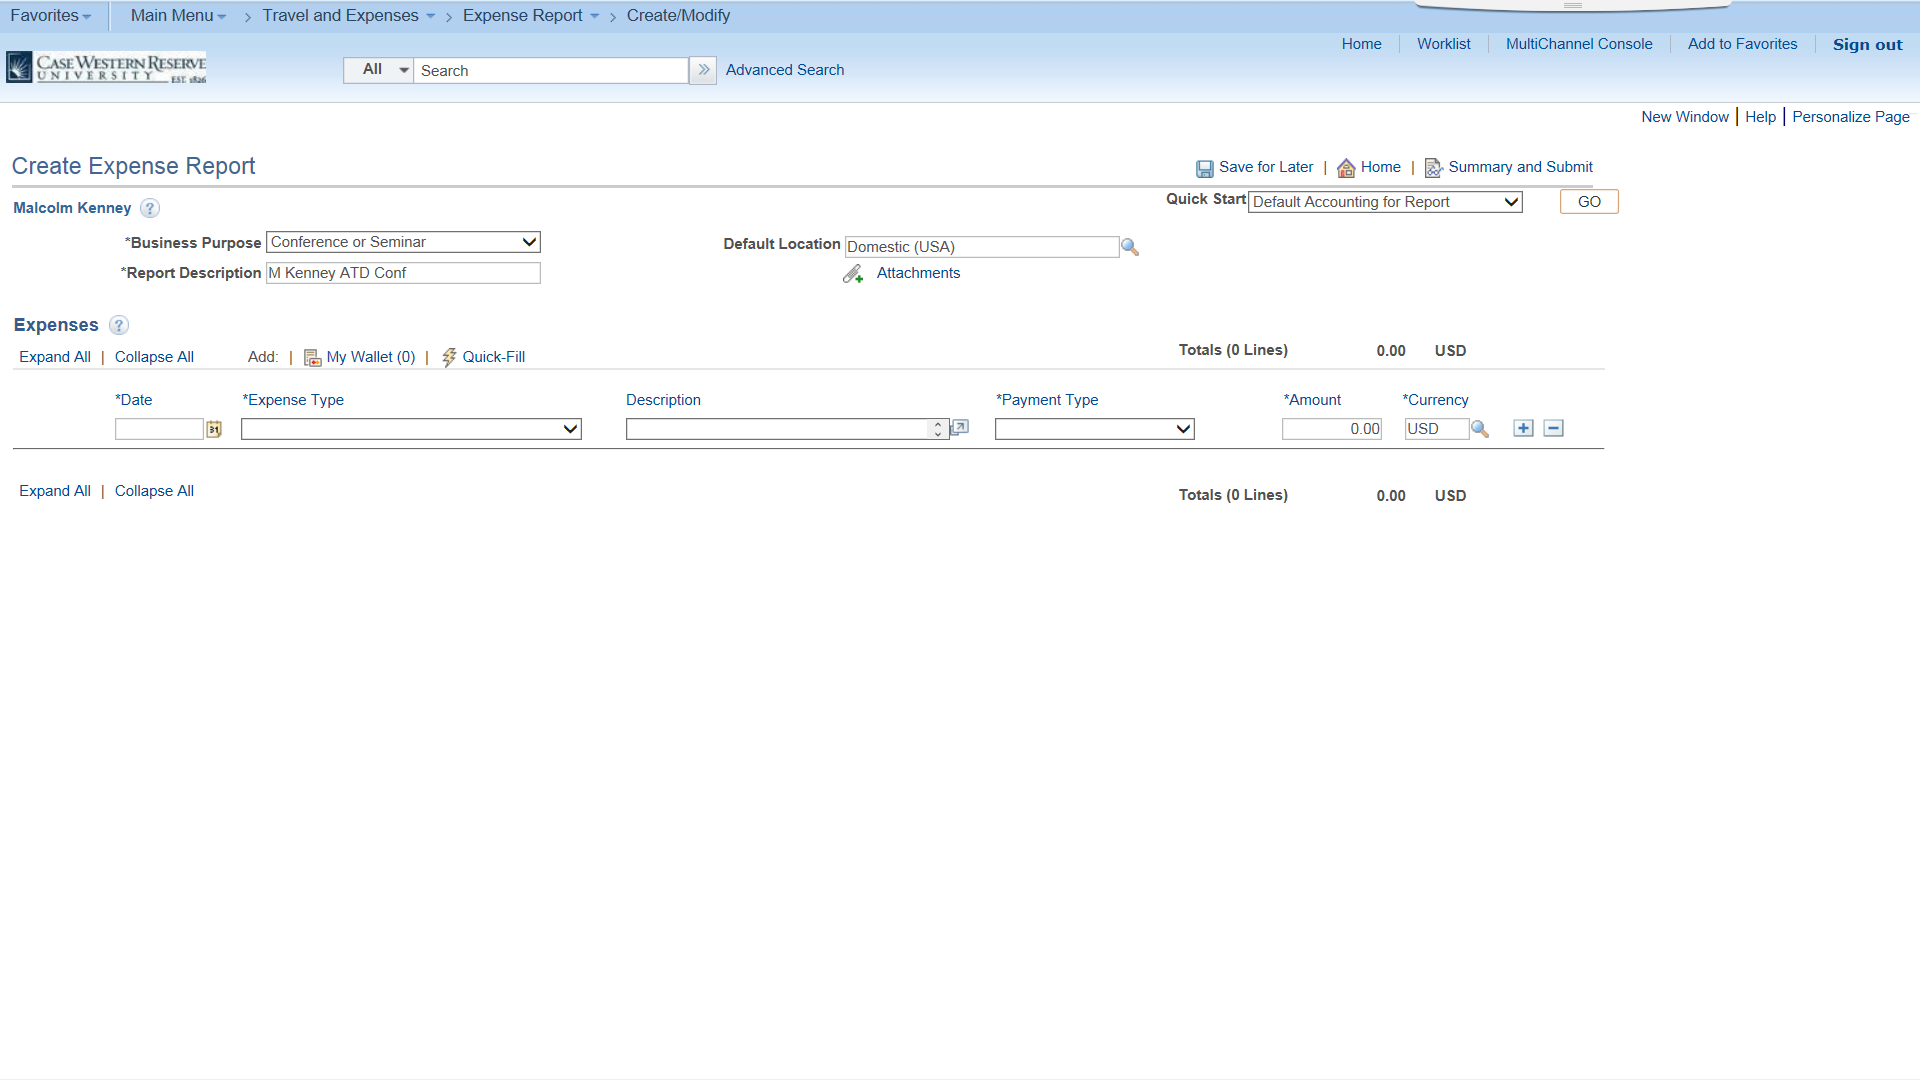
- To get started, click the Business Purpose list to choose the option that fits the travel reimbursement.
For this example, we will select the Conference or Seminar list item. - Type your name and type of event in 20 characters or less (e.g.: D Moore ATD CONF) in the Report Description,
For CWRU, we are keeping our expense location to high-level destinations/geographical categories.
- Athletic Department Travel - To be used by the Athletics Department
- Conference or Seminar - Travel type
- Development/Finance - Travel type
- Field Research - Travel type
- Non-Travel - For employees or students, a different expense type menu will generate if selected
- Other Travel - For business purposes not found in menu. Please specify in description field
- Recruiting - Travel type
- Speaker/Lecturer - Travel type
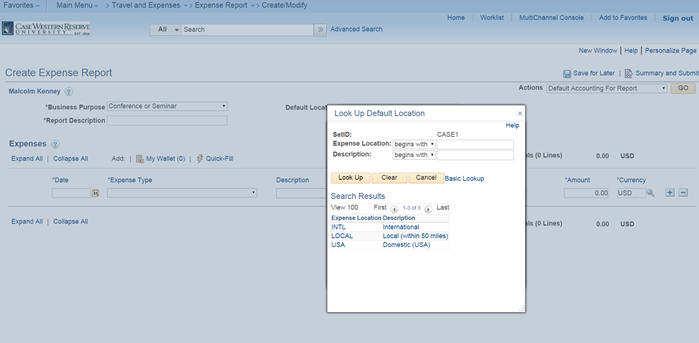
- The Default Location will be Domestic (USA)
- If a different default location is needed, click the Magnifying Glass next to the Default Location box. Three default options will appear. Besides Domestic (USA), you may select Local (within 50 miles) and INTL for International Travel.
- In the Expenses area, you will enter your information.
Enter the Date of the expense by clicking on the Calendar icon.- INT = International (Including Canada and Mexico)
- LOCAL = Within a 50-mile radius of CWRU (no need to use non-travel option)
- USA = Domestic travel within the 50 states and U.S. Territories
- Click on the Expense Type drop-down link to select the corresponding expense type based on the expense. This selection will change based on the business purpose selected above.
- A list of all expense types will appear. Choose the expense type for the expense to be entered.
- The expense type feature allows you to identify and classify valid business expenses incurred while traveling. As you are processing the expense report, the billing code determines the group it should be billed to and set of accounts to charge. Below is a list of each expense type detail.
- Airline Change Fees: Airline Ticket change fees authorized by department
- Ancillary Airline Fee: Airline fees for internet, expedited boarding, legroom (Airline food fee should be listed as food)
- Automobile Rental: All policy-permitted Car Rental Charges
- Business Supplies on Travel: Business items purchased while on trip
- Conference and Seminar Fees: Registration related to administrative charges, session fees
- Gratuities/Tips: Gratuities and Tips
- Hotel/Lodging: Lodging expenses: Can be broken down in detail beyond room/tax
- Internet/Telephone: Internet and phone charges
- Meal (Alcohol Only): All permitted alcohol charges; use food/alcohol for large event alcohol expenses only
- Meal (Breakfast Actual): Detailed receipt-based for meals over allowance amounts
- Meal (Lunch Actual): Detailed receipt-based for meals over allowance amounts
- Meal (Dinner Actual): Detailed receipt-based for meals over allowance amounts
- Meal Allowance All Meals: $48 per day (eliminates the need to list each allowance meal separately)
- Meal Allowance (Breakfast): $10 breakfast allowance
- Meal Allowance (Lunch): $12 lunch allowance
- Meal Allowance (Dinner): $26 dinner allowance
- Meals with Guests: Detailed meal receipt-based for traveler-hosted meals
- Mileage: For personal vehicle use; Automatically updated semi-annually (July 1st and January 1st)
- Other Travel Expense: Items not included in the menu
- Parking/Tolls: Receipt-based parking and toll charges
- Public Transportation: Intra-city public transport - no receipt needed
- Rental Car Fuel: Fuel for rental cars only
- Taxi/Limo: Taxi, Shuttle, and Limo services
- Train Travel: Train Travel
- Travel Agency Fees: Travel Agency Fees

- Enter expense details in the Description field. For example, if the expense is air travel related, enter origin and destination information (CLE to BWI).
- Click on Payment Type to select how expense was paid. There are three options to choose from
- Personal Out of Pocket: Use for personal credit card or cash
- Pre-Paid (CWRU): Pre-populated from preferred travel agency data only. Check non-reimbursable expense in detail in each expense line to note other pre-paid expenses associated with trip such as p-card use
- T&E Card (CWRU): American Express T&E Card (pre-populates expense lines via My Wallet)
- Enter the monetary amount for the expense in the Amount box.
- The currency will default to USD (US Dollars). If you need to use another currency, click on the magnifying glass icon to search for and select appropriate currency to use.
- Choose the Billing Type from the list. There are two to choose from: Employee (Faculty & Staff)and Student.
- To add or remove expense lines, click the Plus or Minus sign icon button next to amount box
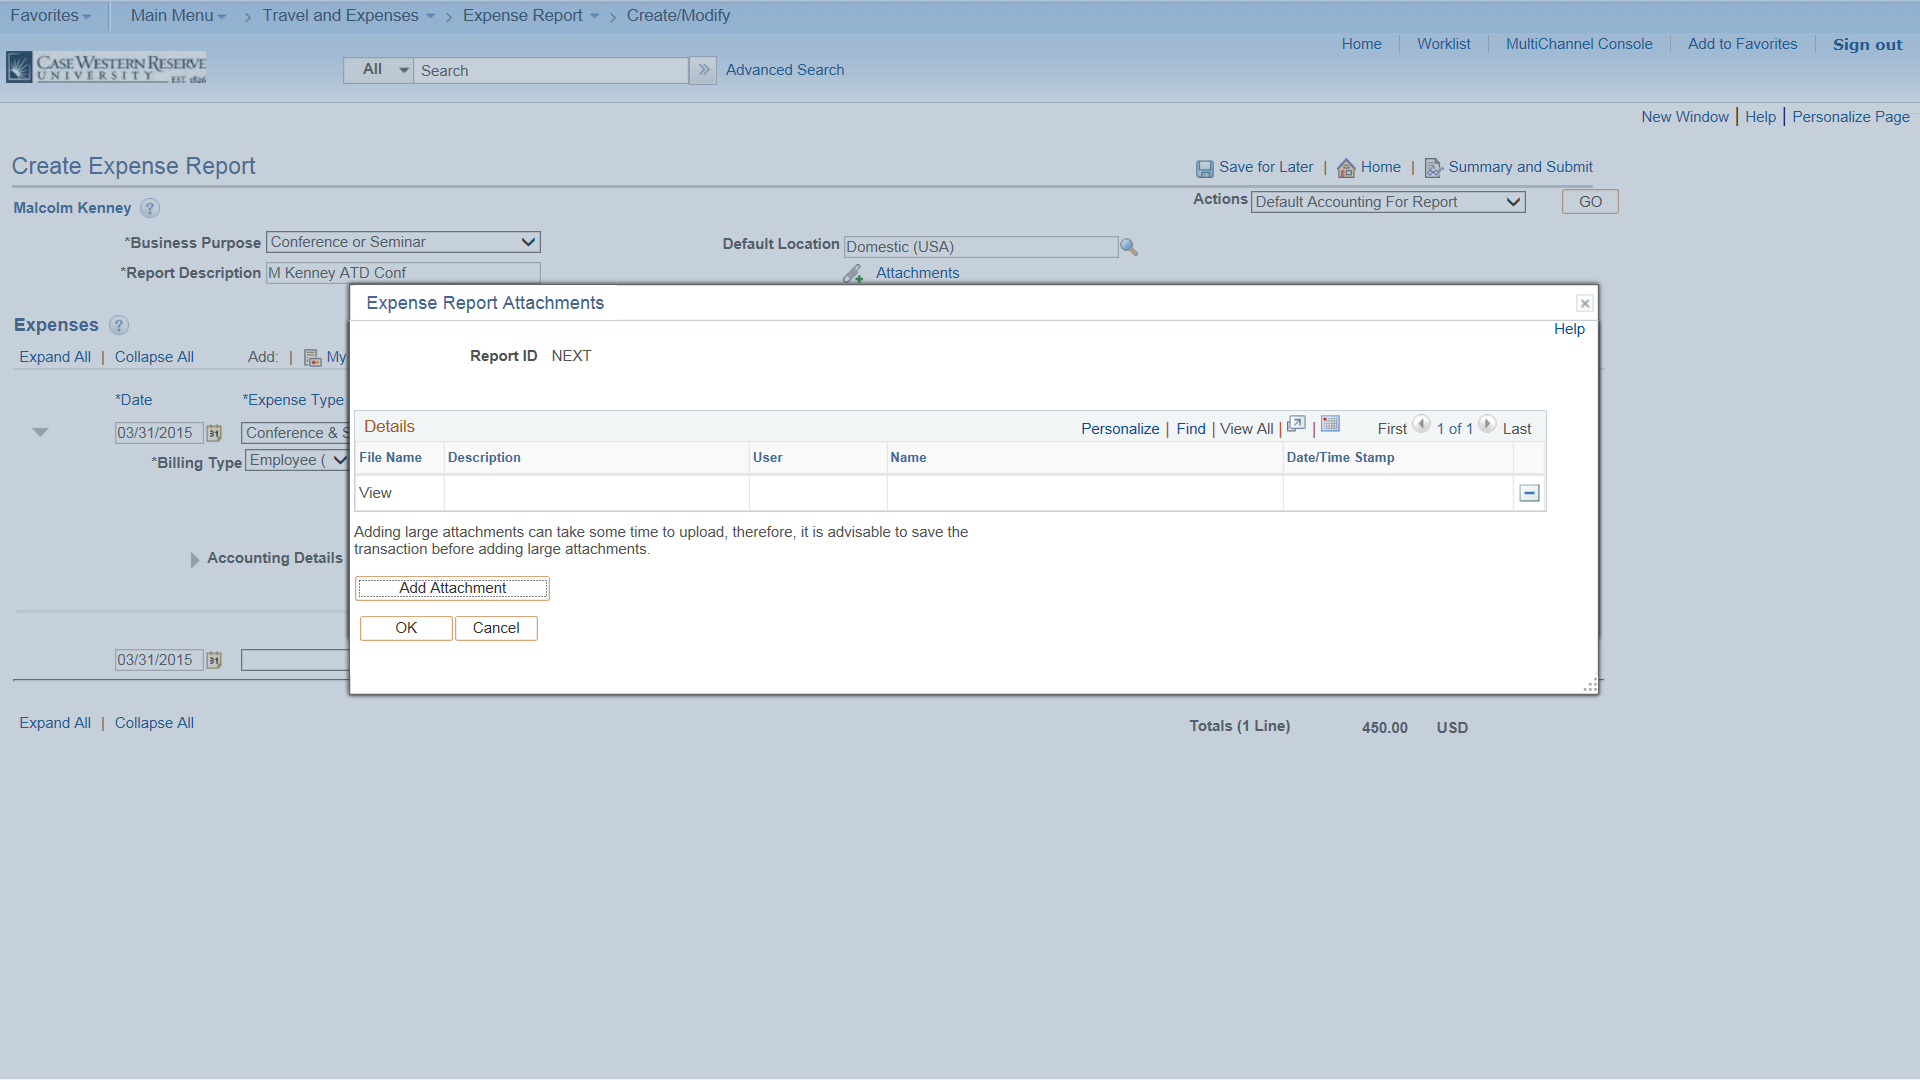
- Click the Attachments button under the default location menu to add any supporting documents. PLEASE NOTE: You can attach multiple files, and others may add files to support your expense. If you are attaching large files, it is advised that you save your transaction first.
- Click Add Attachment button to select the file(s) you would like to attach.
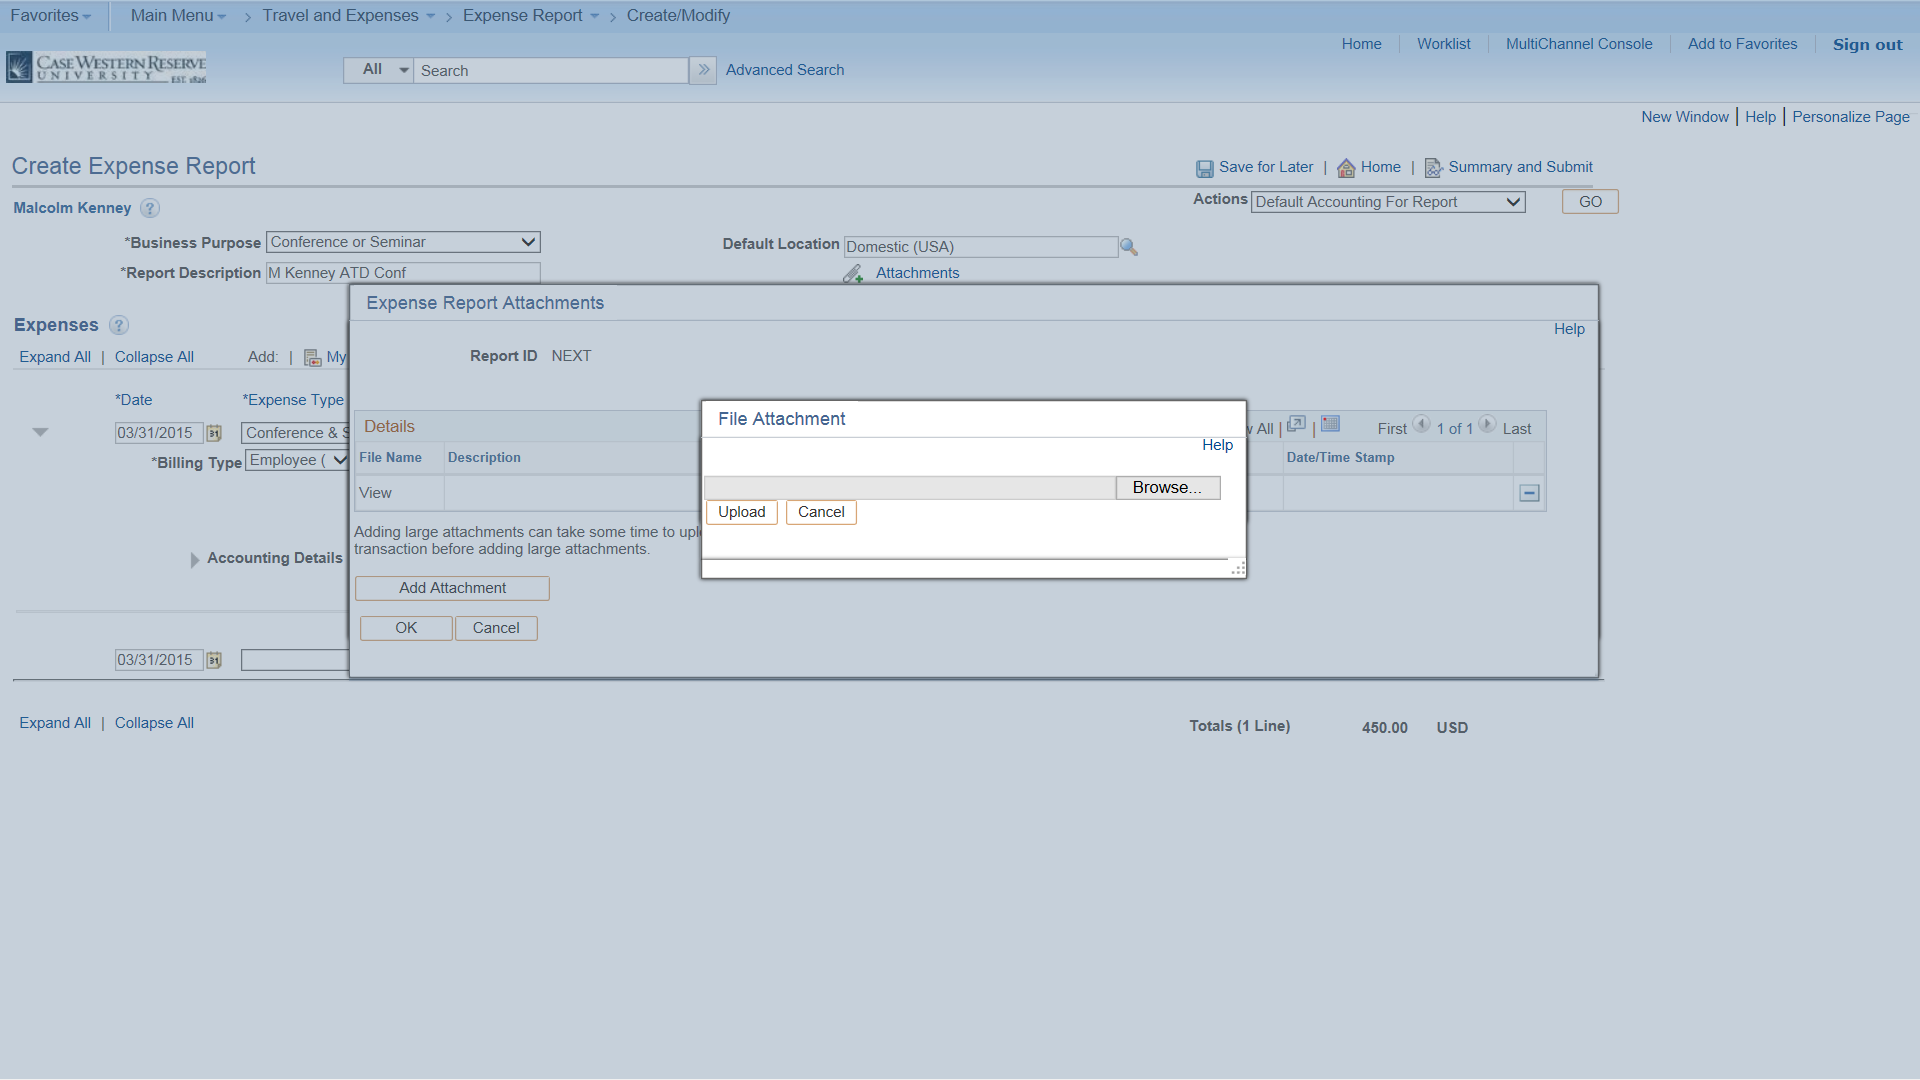
- Click the Browse button to select file(s) to attach.
- Click Add Attachment button to select the file(s) you would like to attach.
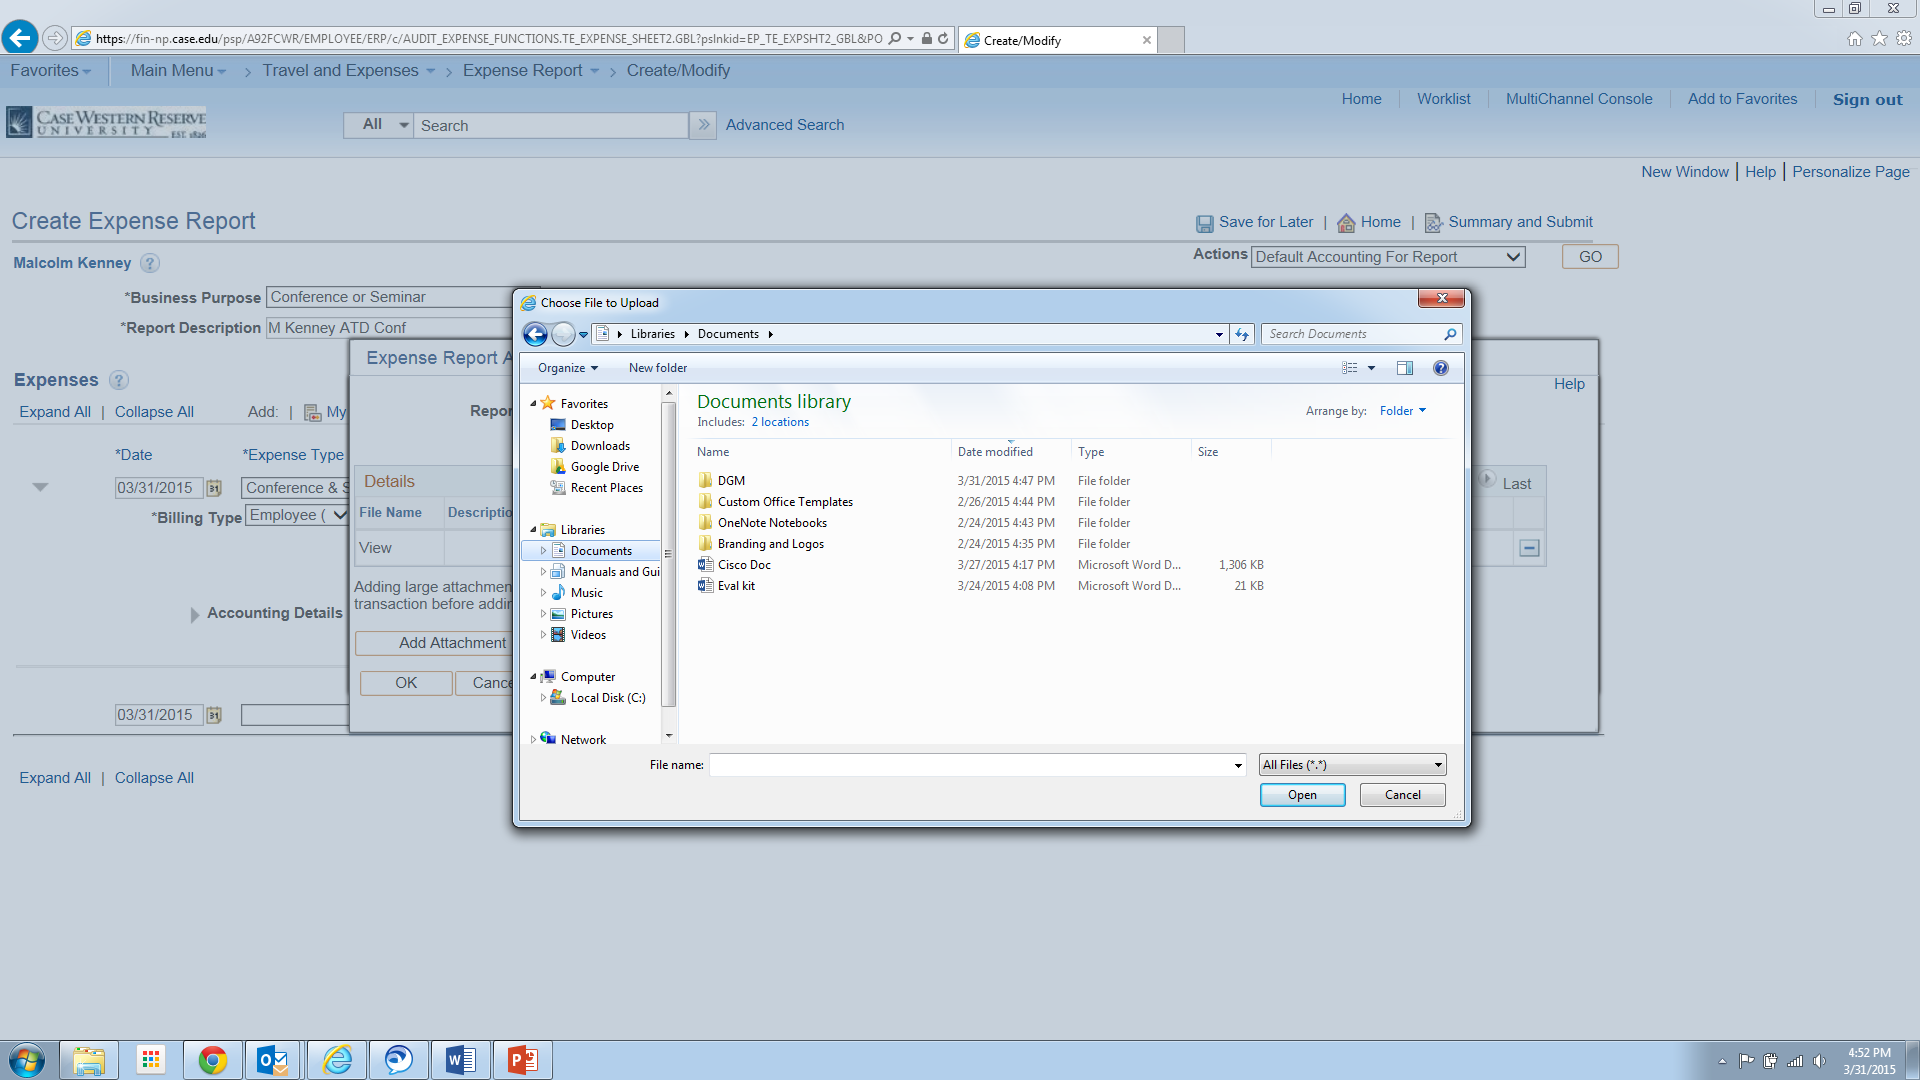
- Find the document(s) to attach in your Documents Library. Click on the document and click the Open button.
- Click Add Attachment button to select the file(s) you would like to attach.

- Click the Upload button.

- You will see a link for the attachments. When you are done, click the Okay button.
- Click the GO button on the top right hand side.
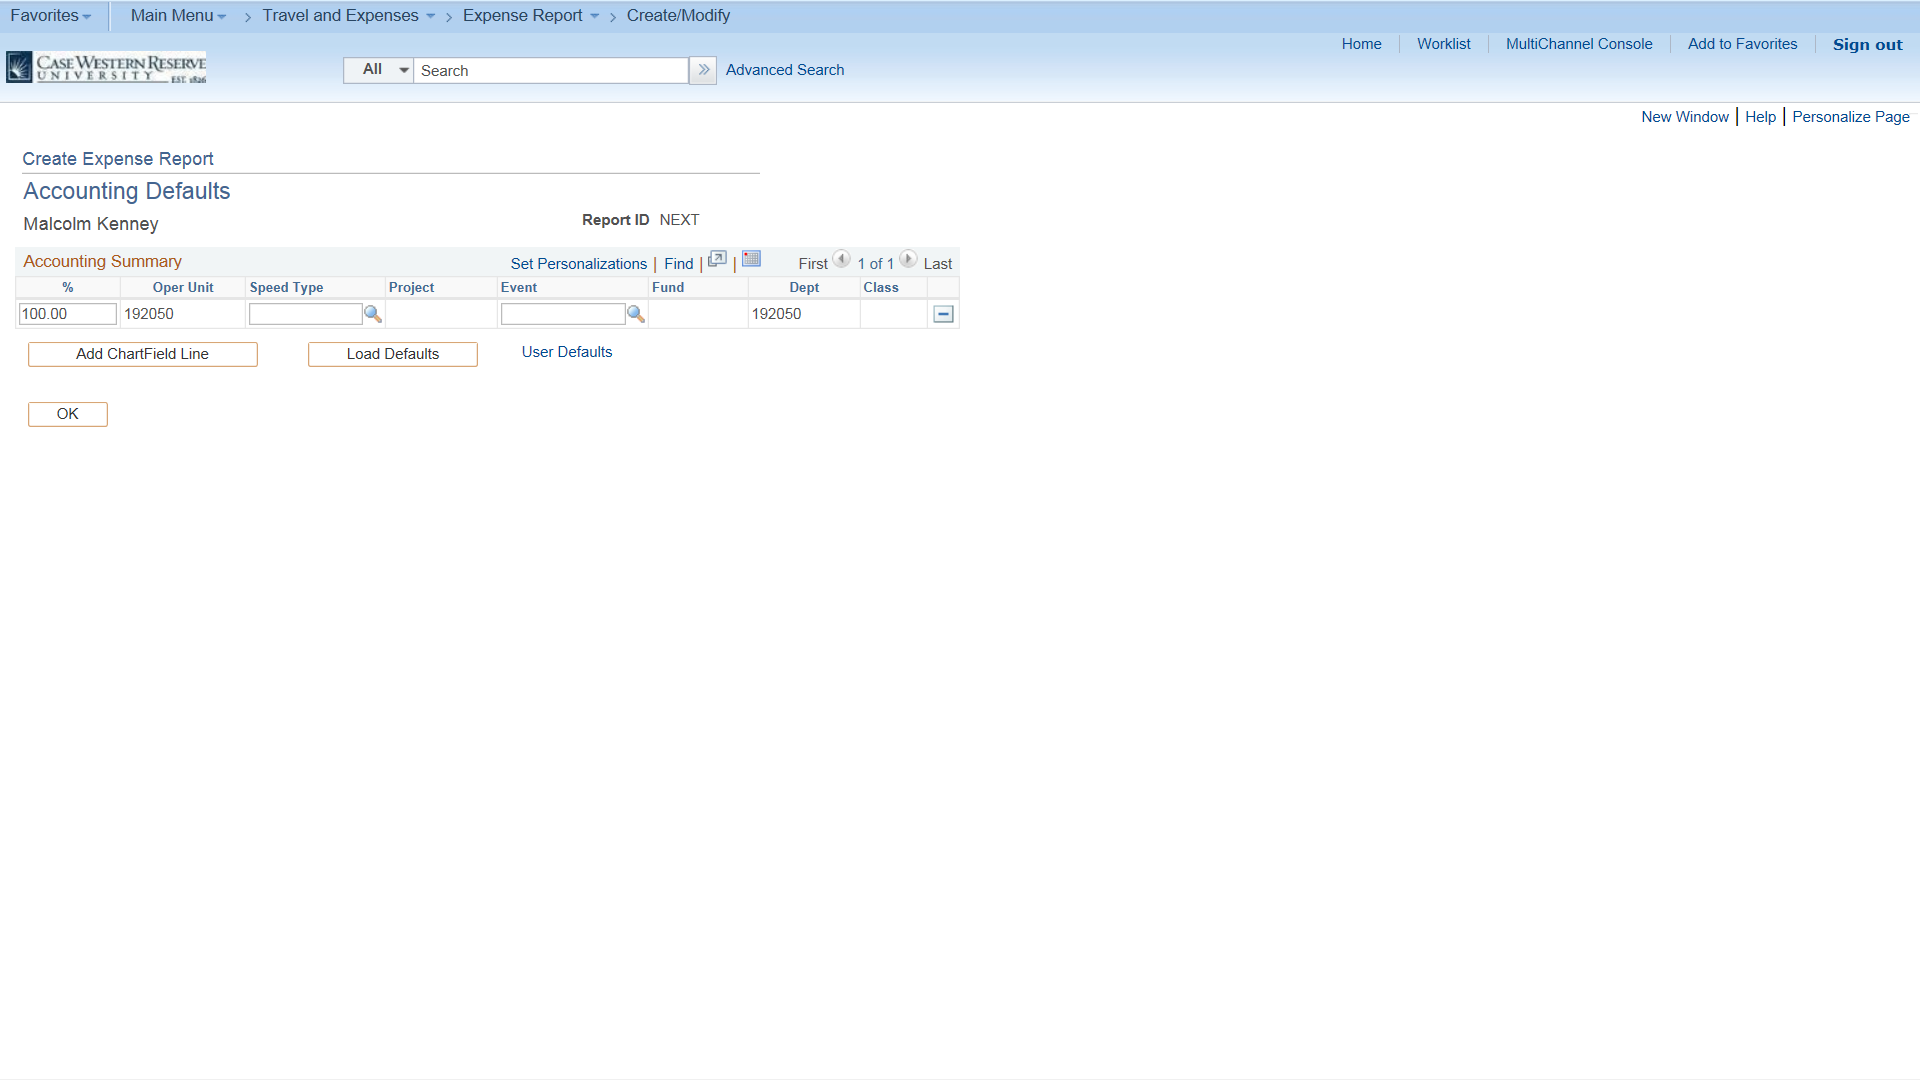
- You are now on the Accounting Defaults screen. Under Accounting Summary, add the Speed Type and Event Codes here. Click on magnifying glass icon to look up codes for each.
- Click the OK button when finished.
Please Note: You can also enter account speed types by clicking on the Accounting Defaults link. Simply click on the arrow and you will see the same information.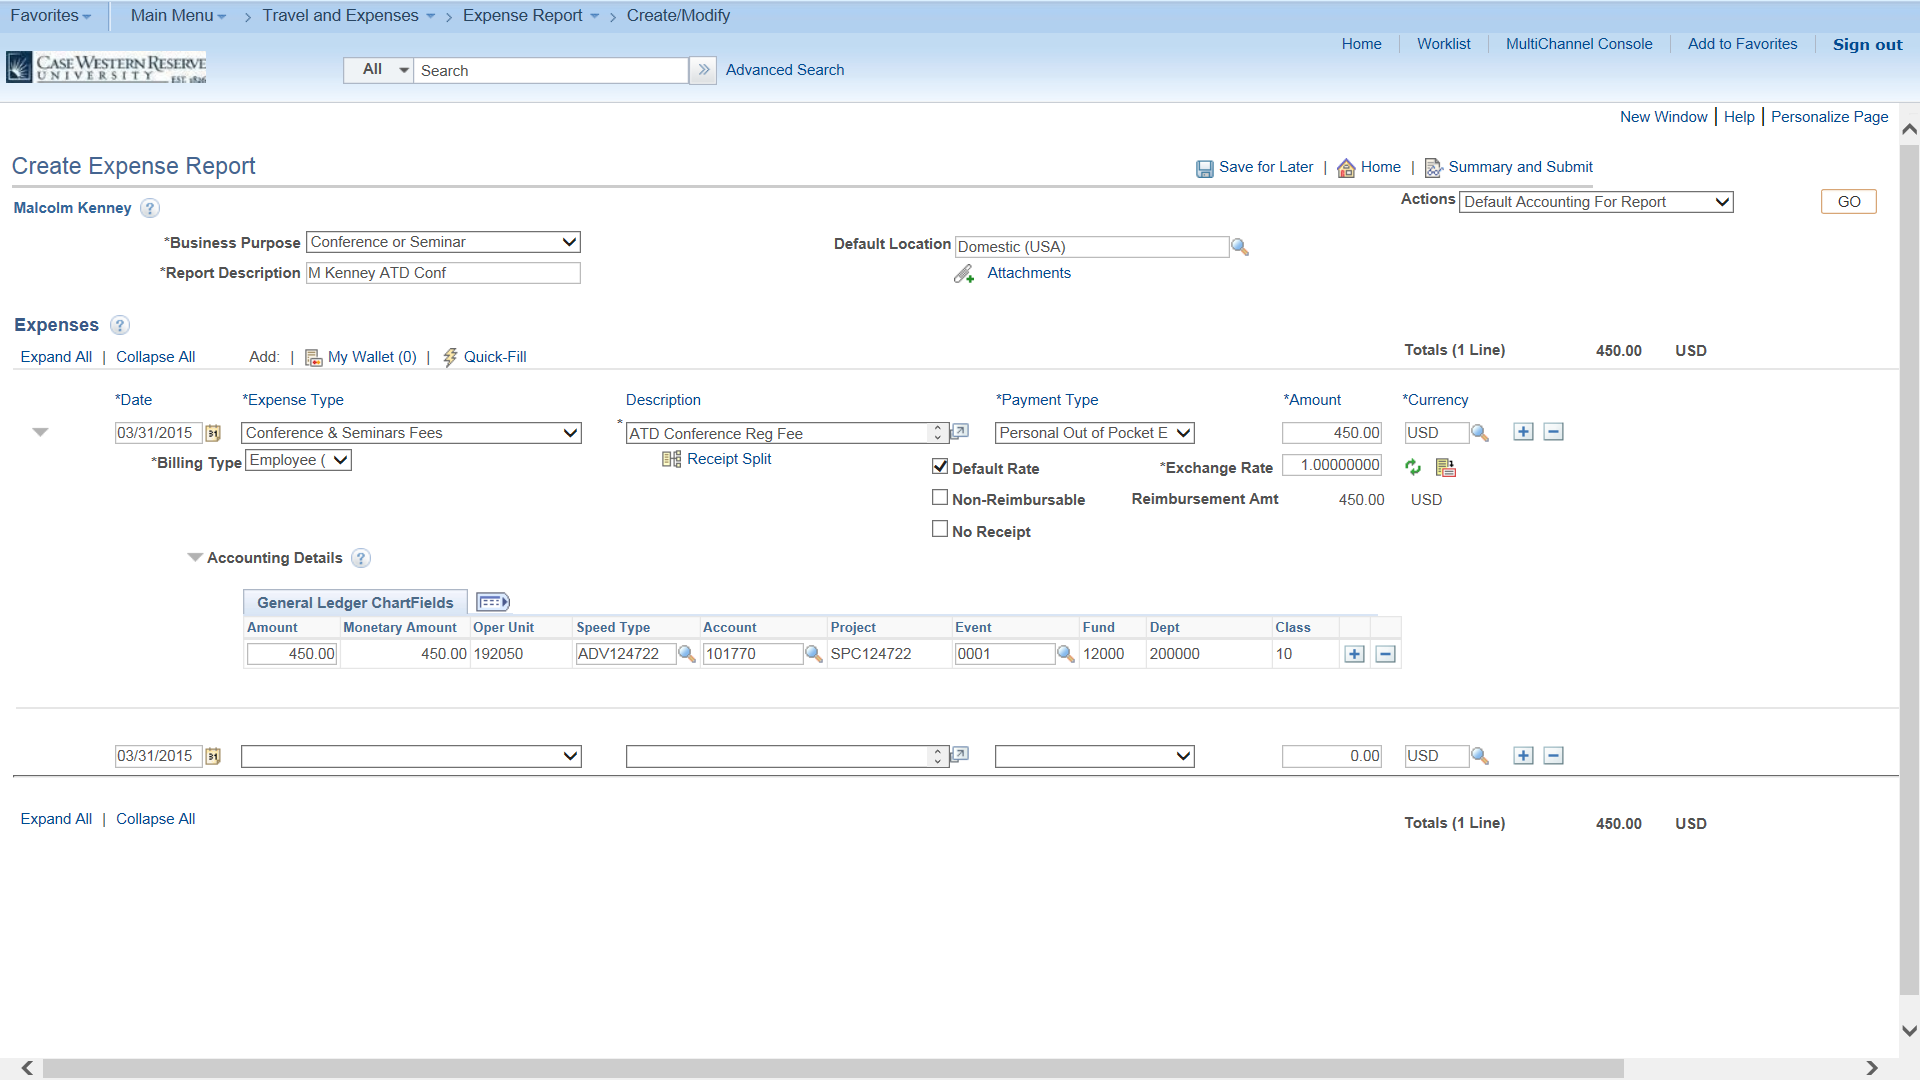
- To go to approval screen, click the Summary and Submit button on the top right hand corner of the page
- On this screen, you will add comments regarding your expense report. Click the Notes icon on the top of the page.
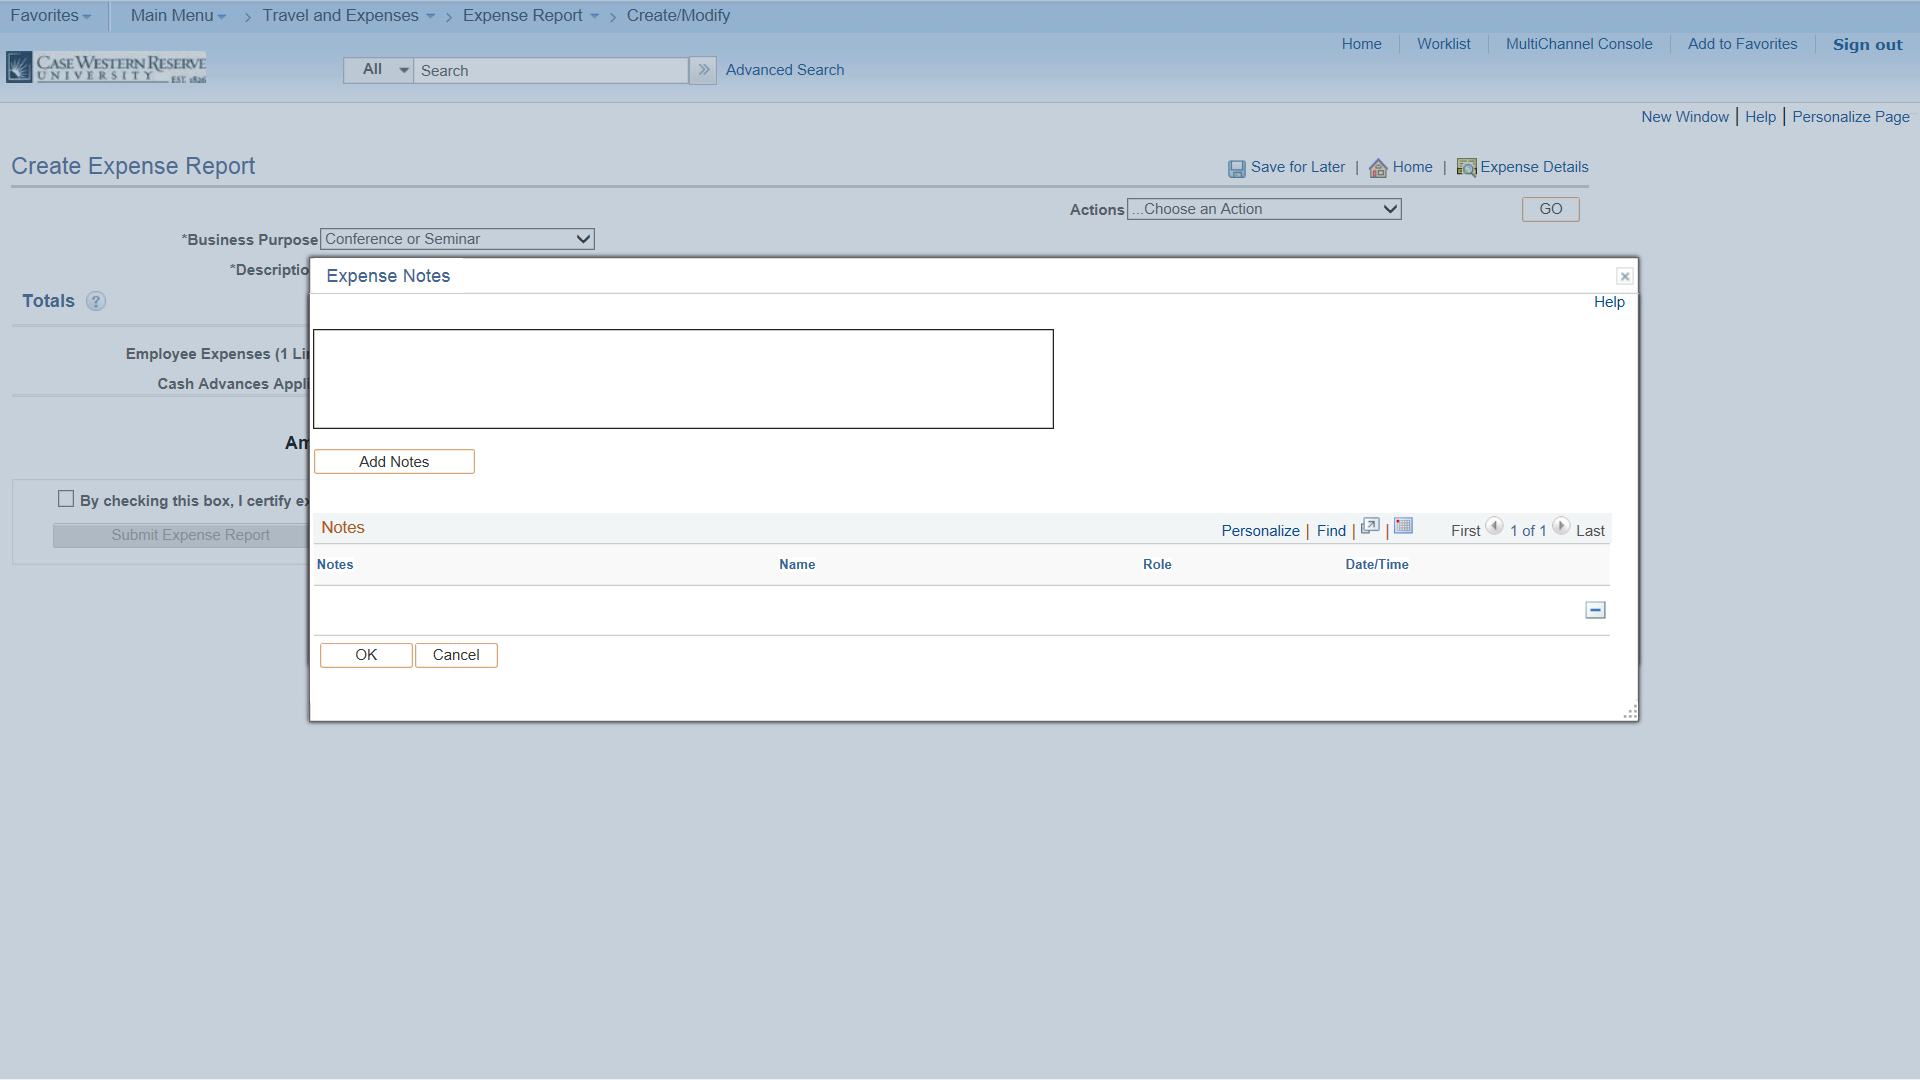
- Type notes related to this report. Click the Add Notes button when finished.
- You will see notes below the Notes section. Click OK button when complete.
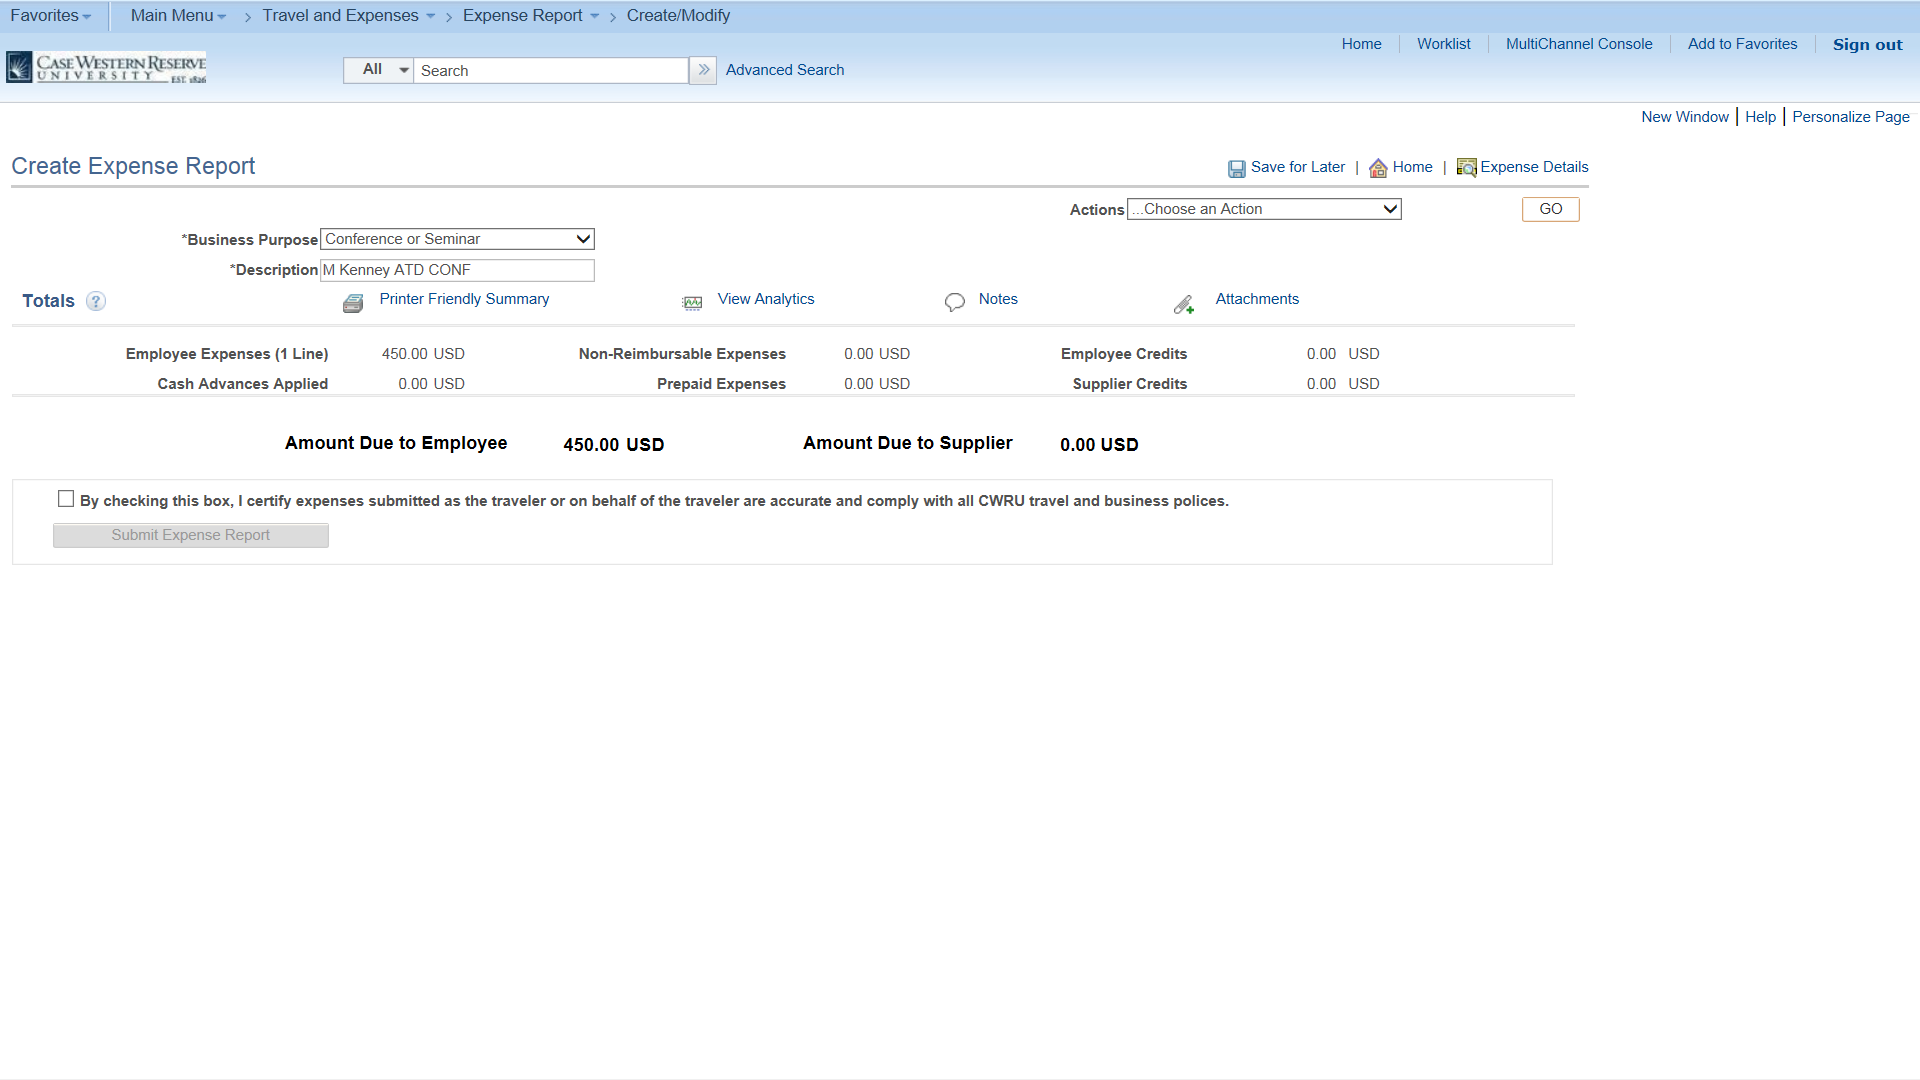
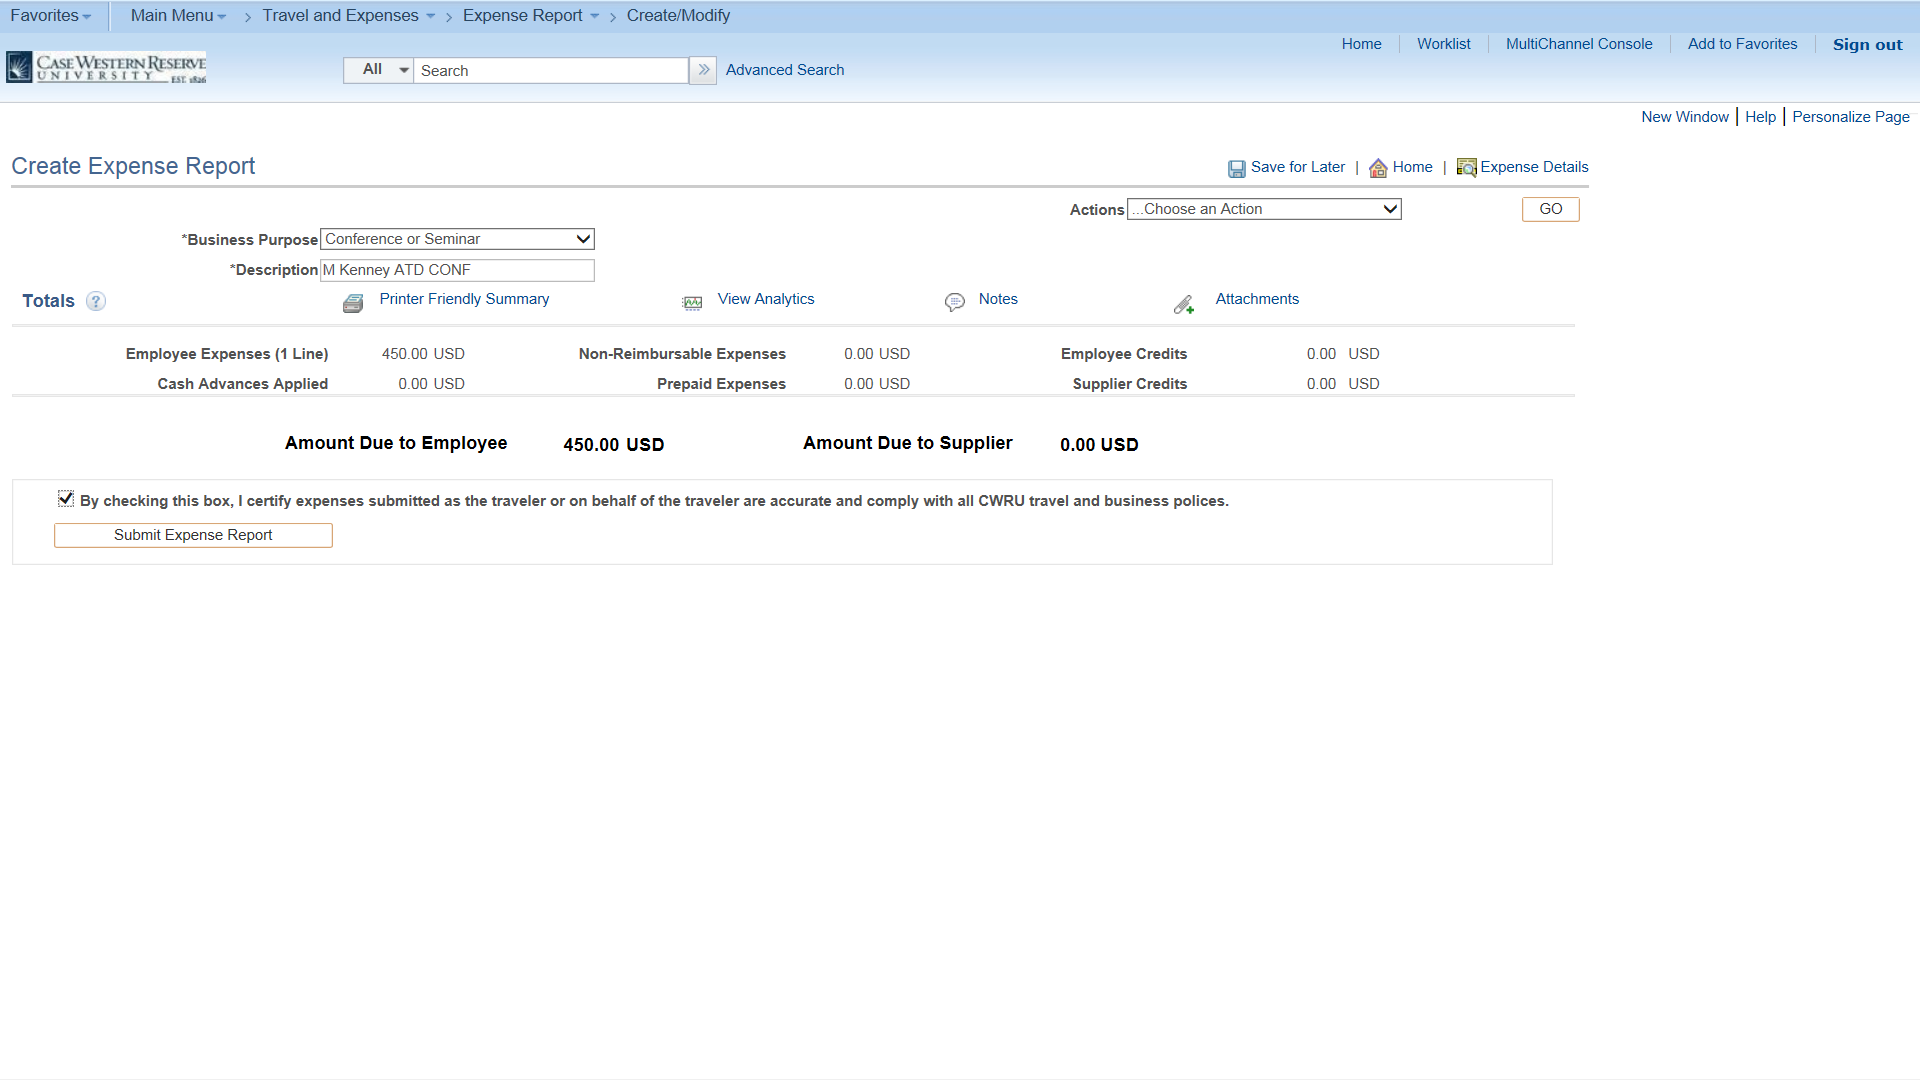
- After verifying that your expense report is accurate, click the box to submit for approval.
- Click Submit Expense Report box.
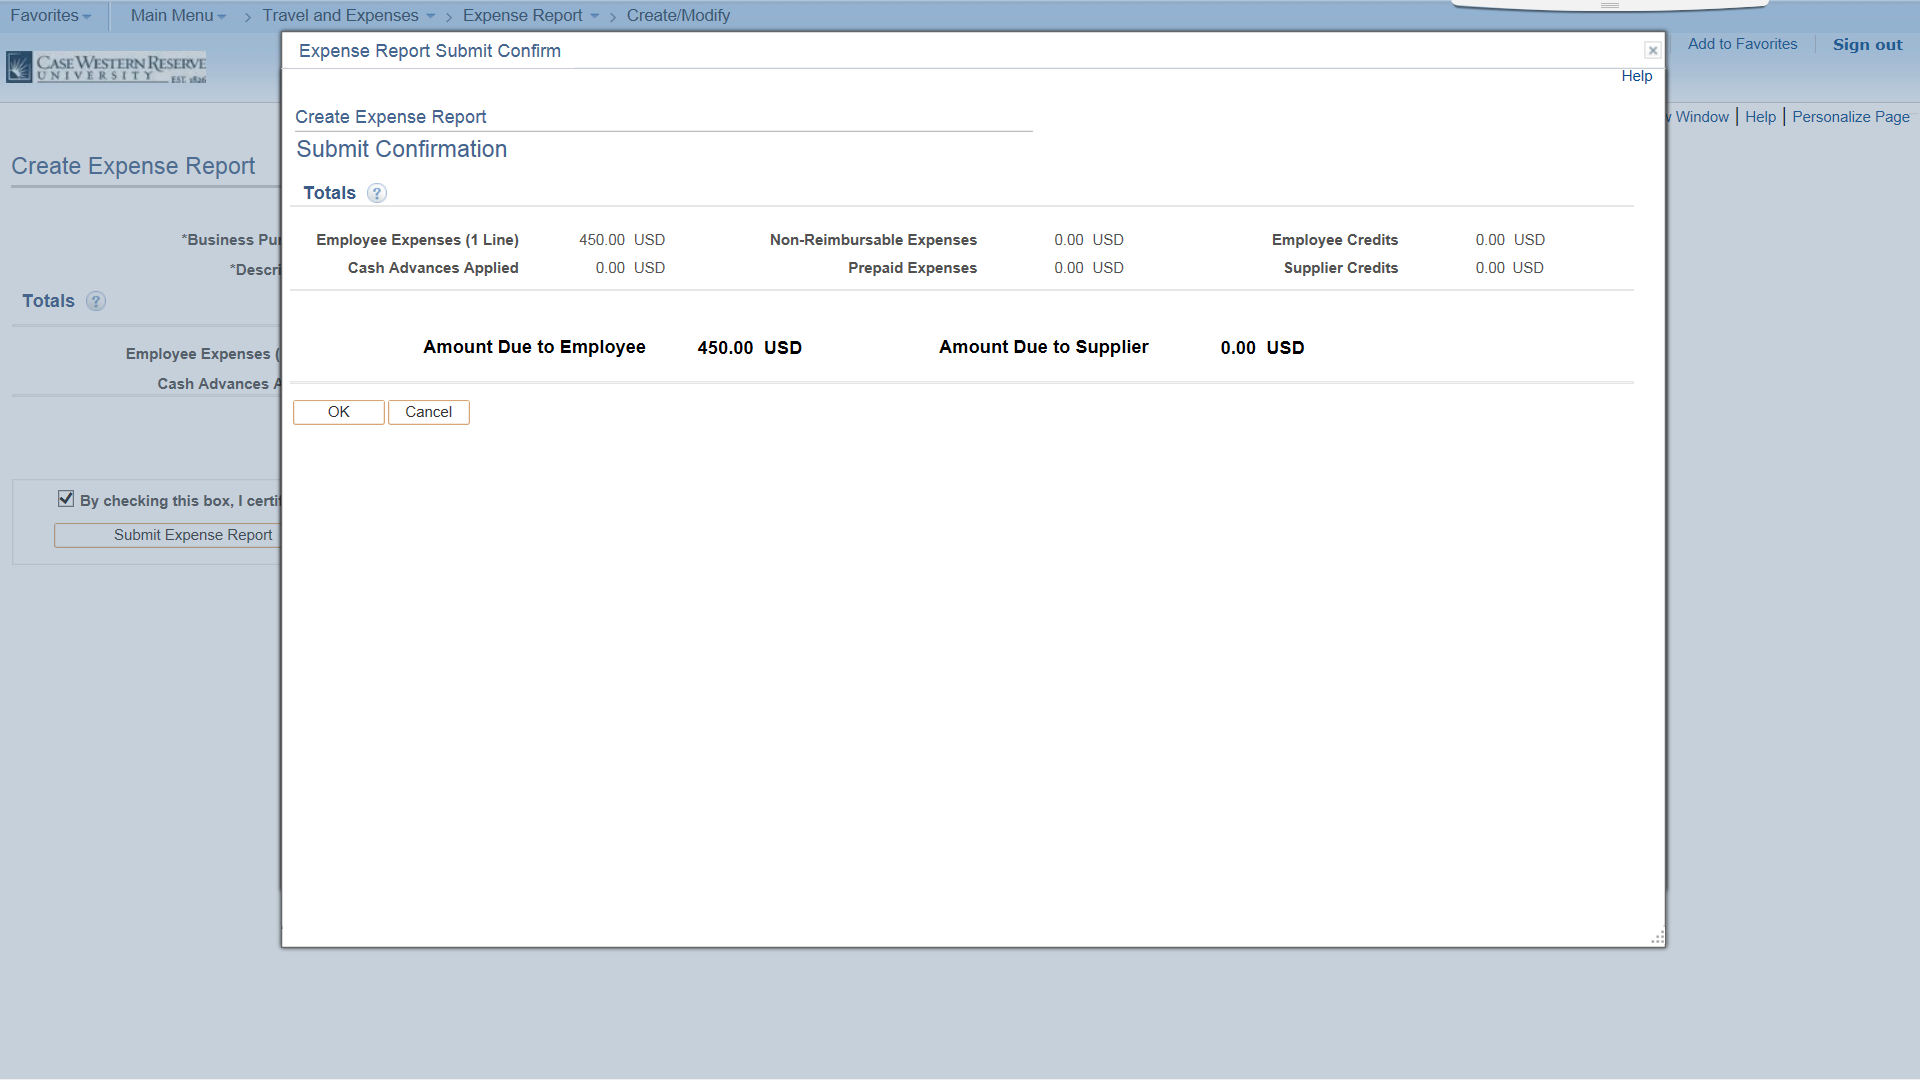
- You will get the Submit Confirmation Page, which summarizes expenses. Here you will double-check that all information is correct and ready for submission.
- Click OK box to submit report.
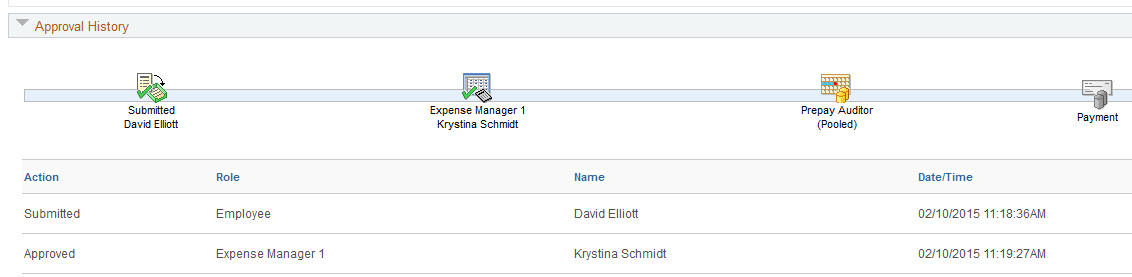
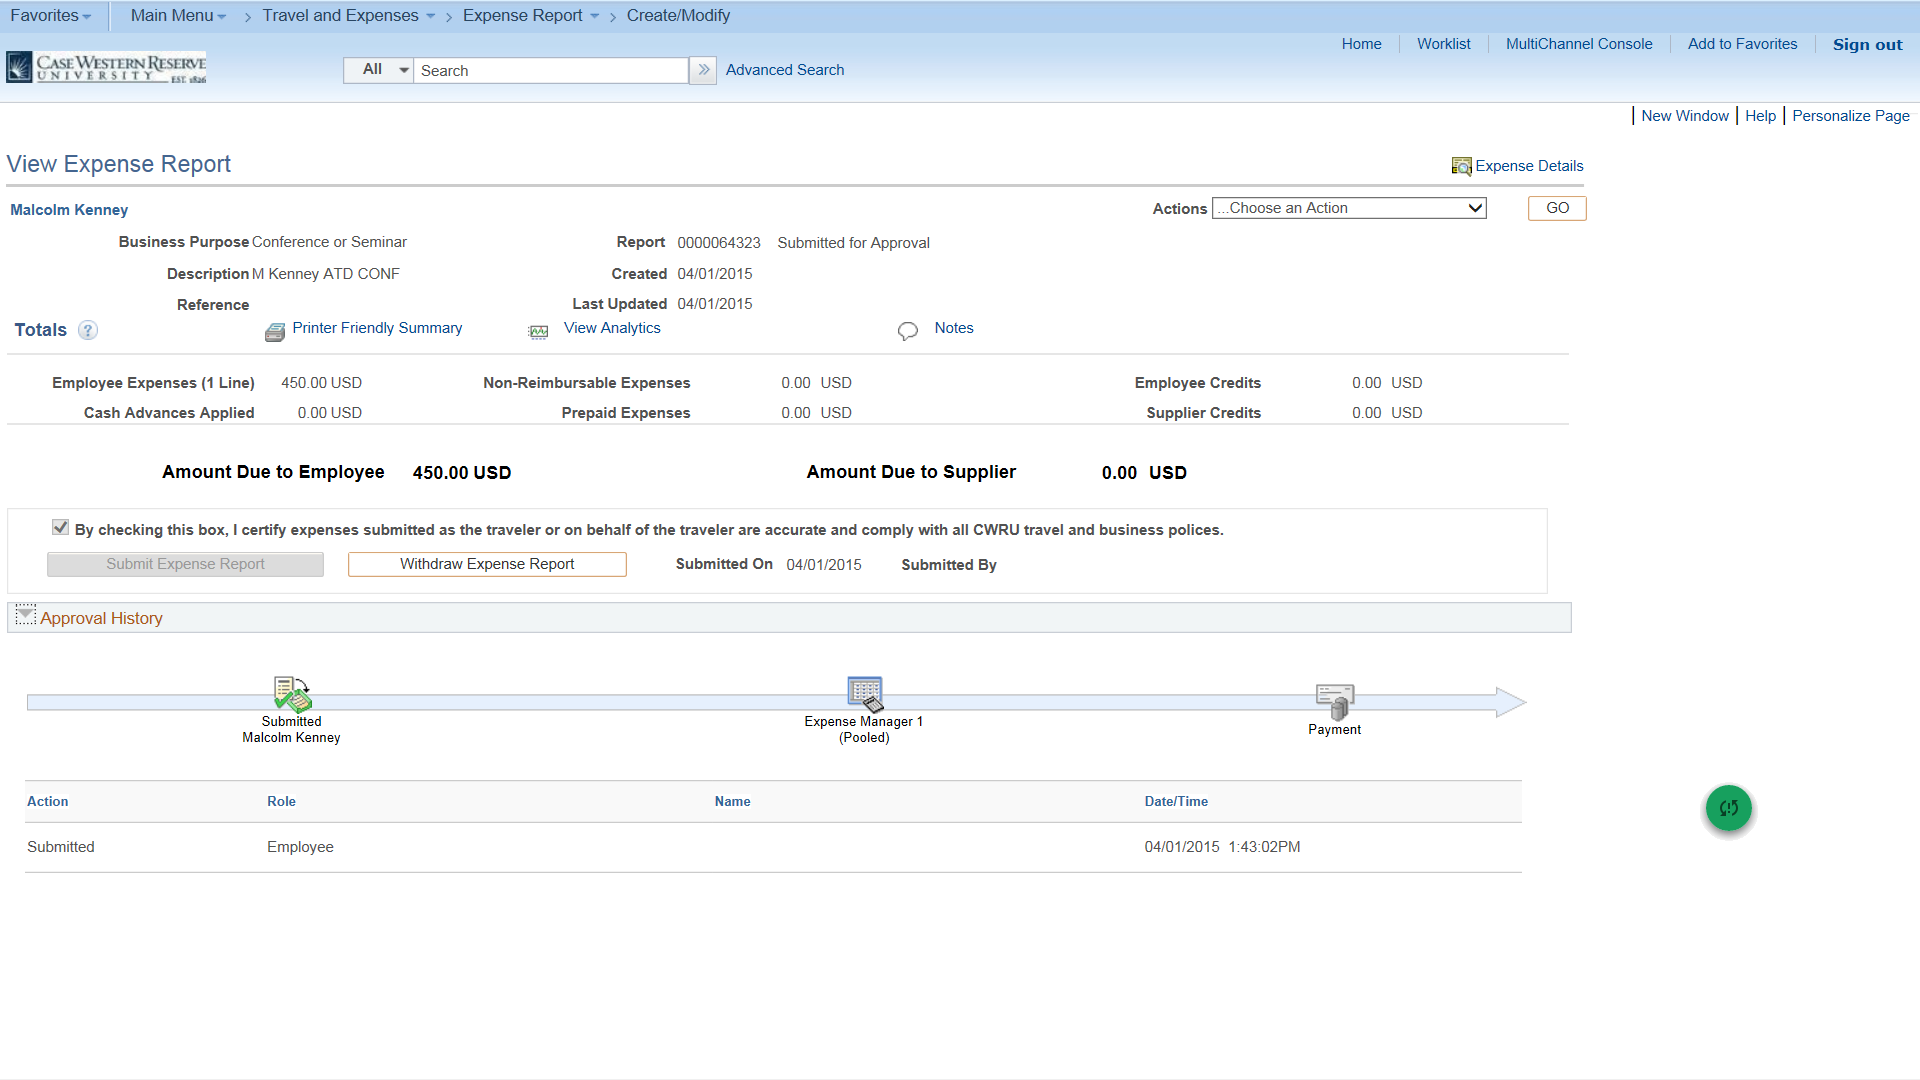
- To check the status of approval process, click the Approval History link from the View Expense Report screen.
- You can also withdraw an expense request by clicking the Withdraw Expense Report button from the View Expense Report Screen
- You will receive a message that states Your expense report 0000064323 has been withdrawn from the approver's queue.
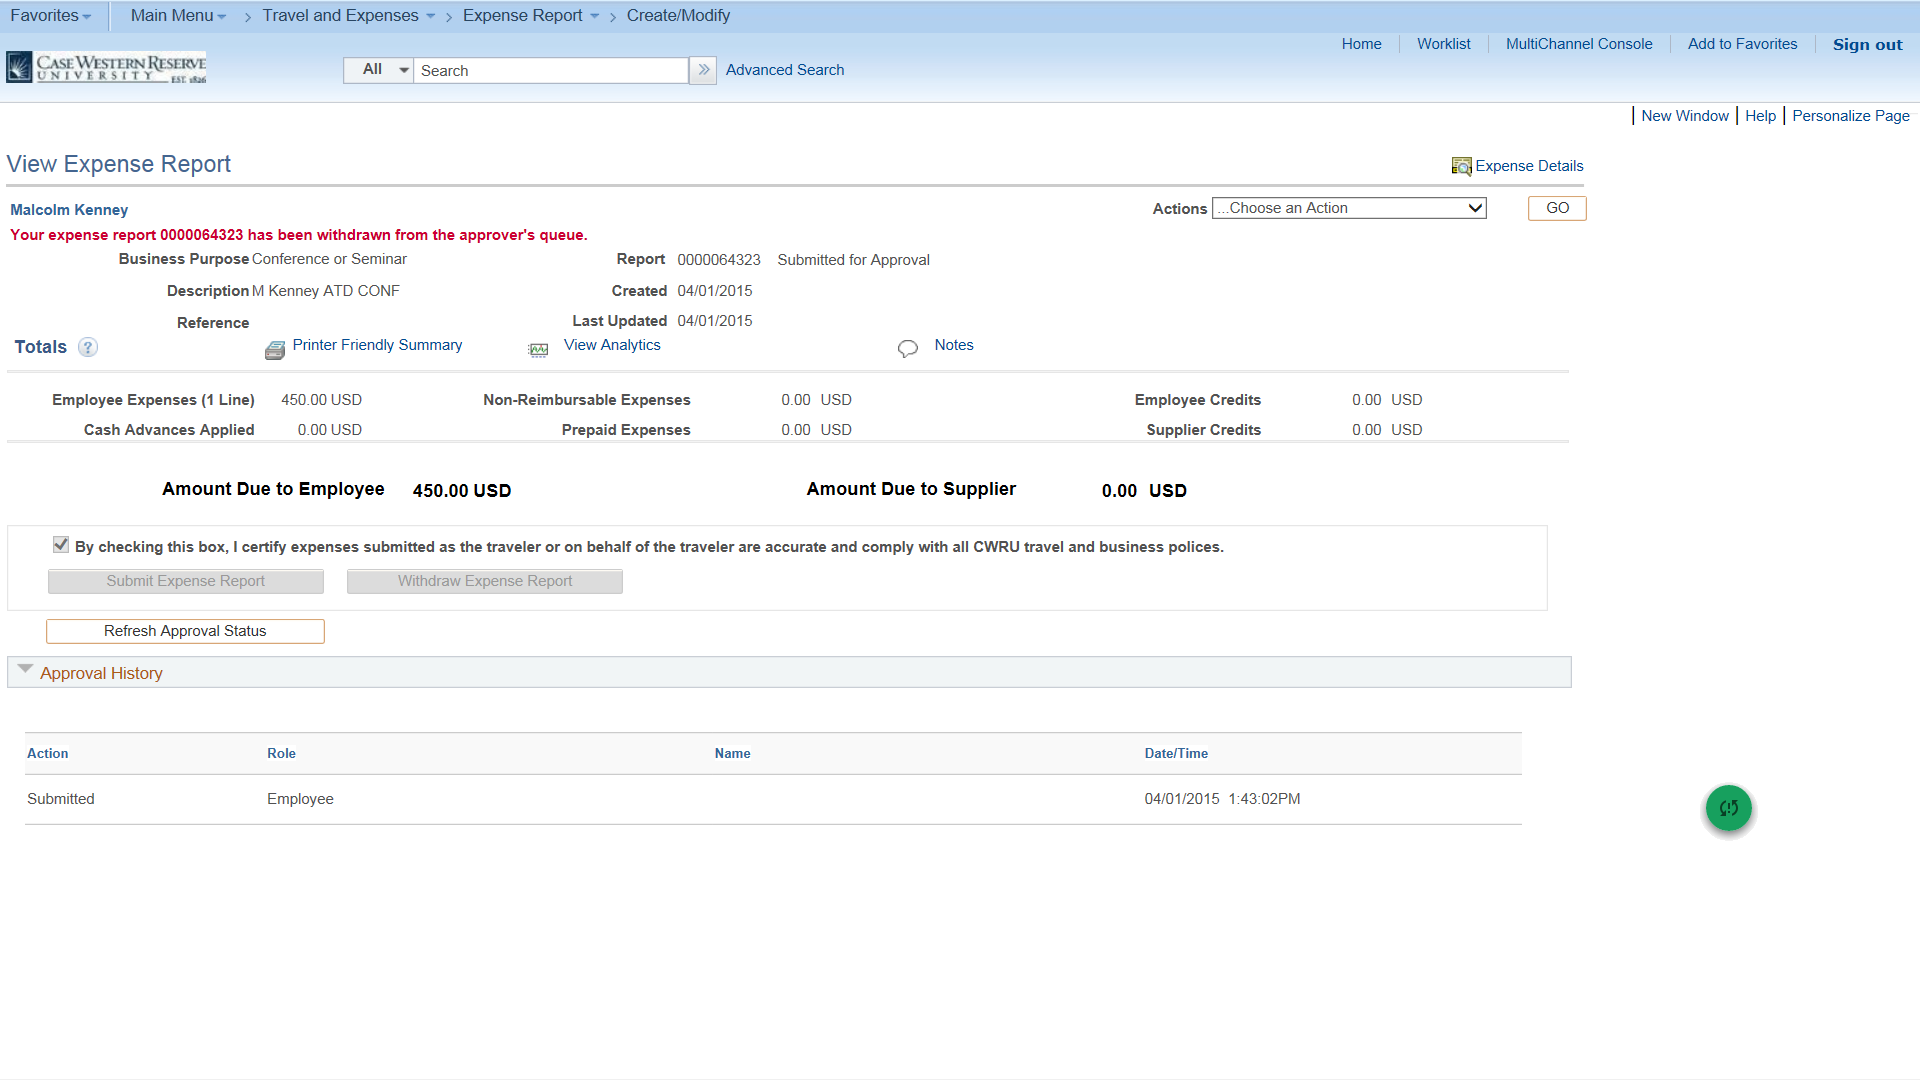
- End of Procedure