Zoom allows for auto transcription of your meeting. Follow the steps below to enable this feature.
This tool is not appropriate for courses that have students with a captioning need. If you have a student with a captioning accommodation and are using Zoom for your courses, please contact Disability Resources.
Note: this tool does not currently work while in Breakout Rooms.
Enable Closed Captioning
- Log into the Zoom web portal at case.edu/zoom and select "Sign in".
- From the left side menu select "Settings".
- Select "In Meeting (Advanced)" from the left side menu.
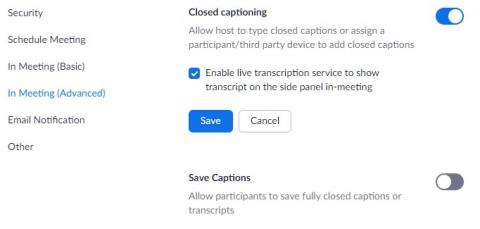
- Find the "Closed captioning" setting and move the right hand slide button to the "on" position (turns blue).
- You may receive a message "The following settings depend on this setting, the change might affect them: Save Captions". If you see this, click "Enable".
- To allow Zoom to closed caption the meeting while it happens, check the box next to "Enable live transcription service to show transcript on the side panel in-meeting" and click "Save". This allows closed captioning without the need of a third party, so remember to click "Save".
- If you want to allow participants in your event to save the transcript of what was captured by the captions, move the right hand slide button to the "on" position (turns blue) for the "Save Captions" setting.
Start Live Transcription
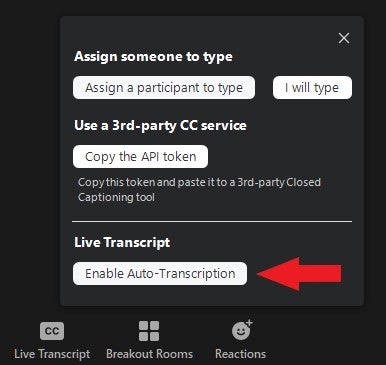
- When you start your hosted Zoom event, click on the "Live Transcript" button on the meeting control bar.

- If the button on the control bar says "Closed Caption", not "Live Transcript", return to your settings and verify you clicked "Save," as shown in step 5 above.
- Select "Enable Auto-Transcription". Your meeting will show closed captions to all participants.
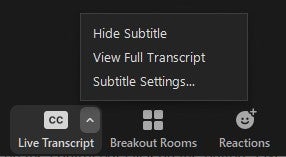
- Make in-meeting changes by clicking on the chevron next to "Live Transcript".
This must be done for every meeting. Currently there is no method to automatically start live closed captioning.