Full disk encryption protects the data on your device in the event it is lost or stolen. Without full disk encryption, if the data drive in the computer is removed, the data can be easily read and accessed. When correctly deployed, full disk encryption requires unauthorized users to have both physical access to your device as well as the password in order to decrypt the data on your device.
Personally-Managed Computers
For personally-managed computers, see the instructions below for enabling full disk encryption on Windows and Mac computers. If you have a university-managed computer, full disk encryption is already enabled.
Enable Full Disk Encryption on Microsoft Windows
BitLocker
Microsoft includes a full disk encryption feature built into Windows called BitLocker.
BitLocker is available on supported devices running Windows 10/11 Pro, Enterprise, or Education edition. It is not available on Home edition.
User Experience
Many newer computers have a built-in encryption chip that unlocks your encrypted files when you log on.
If your computer does not have an encryption chip, you will have an extra verification step on startup before you can log on. This verification step is only required on startup; once verified, you can log on and out of your user account as normal.
Once logged on, navigating folders and saving files will remain the same.
Settings > System > About > Listed under Windows Specifications
Which version of Windows operating system am I running?
Example from Windows 10:

Enabling BitLocker will require administrator privileges. If you encounter any difficulties with these instructions, contact the CWRU Help Desk or visit the [U]Tech CARE Center for assistance.
OIS recommends that you use a standard user account for all day-to-day activities and elevate to admin privileges only when needed. This process can be performed from a standard user account and will prompt for privilege elevation when needed.
You can use your computer while the drive is being encrypted, but you will need to reboot the computer once the encryption process is complete.
Instructions to turn on device encryption for Windows 10 and 11
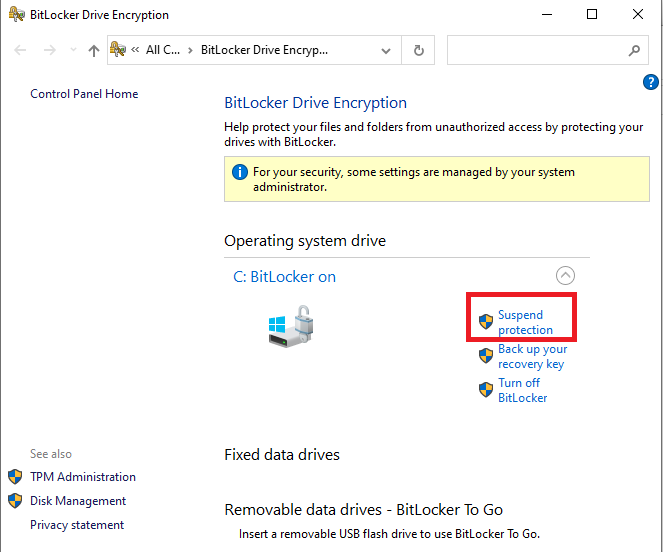
For planned updates, hardware changes, or configuration changes, there is an option in the BitLocker menu to suspend BitLocker but not turn it off. Turning off BitLocker is not recommended for temporary situations, as it will decrypt the drive and require the entire process to be repeated to be turned back on.
When you set up BitLocker, you will need to choose a recovery option in the event you:
-
With TPM chip: forget your user account password
-
Without TPM chip: lose the USB startup key or forget the decryption PIN
-
Upgrade the operating system
-
Move the encrypted drive to a new computer
-
Install a new motherboard
-
Change the boot configuration settings
-
Update the computer BIOS
Recovery options:
- Plaintext recovery key
- BitLocker can generate a plaintext recovery key that can be typed in manually during recovery.
- Save to a file and print out. Store the printout in a secure location, such as a locked drawer or cabinet.
- Save to a USB. Store the USB in a secure location, such as a locked drawer or cabinet.
- Microsoft Account
- You can access your recovery key options at any time through the BitLocker main menu.
- If you ever regenerate the recovery key, make sure you update all of your recovery key backups.
Enable Full Disk Encryption on Apple macOS
FileVault
FileVault provides data and operating system protection for your Mac in the event the computer is stolen or lost. FileVault is available on all Mac computers.
Enabling FileVault will not affect the user experience. Logging in, navigating folders and saving files will all remain the same. Once FileVault is enabled, all data stored on the drive will be encrypted.
Enabling FileVault will require administrator privileges.
OIS recommends that you use a standard user account for all day-to-day activities and elevate to admin privileges only when needed. This process can be performed from a standard user account and will prompt for privilege elevation when needed.
Instructions to use FileVault to encrypt your Mac startup disk
FileVault will encrypt the files for all users of the computer; each user will be prompted to enter their password during setup. If a user is not enabled in FileVault, they will not be able to log in or access their data. User accounts that you add after turning on FileVault are automatically enabled.
When you set up FileVault, you will need to choose a recovery option in the event you forget your account password.
Recovery options:
-
Plaintext recovery key
-
FileVault can generate a plaintext recovery key that can be typed in manually during recovery.
-
The key can be copied into a file and printed out. Store the printout in a secure location, such as a locked drawer or cabinet.
-
- iCloud
- If you store your recovery key in your iCloud account, there's no guarantee that Apple will be able to give you the key if you lose or forget it. Not all languages and regions are serviced by AppleCare or iCloud, and not all AppleCare-serviced regions offer support in every language.
If you want to change the recovery key used to encrypt your startup disk, turn off FileVault in Security & Privacy preferences. You can then turn it on again to generate a new key and disable all older keys. Make sure you update all your recovery key backups.