Locking a file
File locking allows you to prevent other users from editing or replacing a file on which you are currently working.
Note: If you lock a file, remember to unlock it when you are finished editing. Alternatively, set an expiration time for your lock. See Set an expiration time for locked file. Once locked, files may only be unlocked by the individual who locked them or a Box at CWRU administrator.
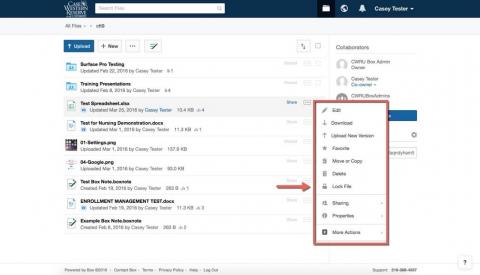
1. Identify the file you want to lock.
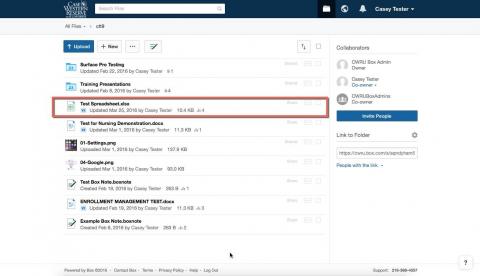
2. Right click the file and click Lock File.
3. Optionally, select Prevent others from downloading this file while it is locked. Click Continue.
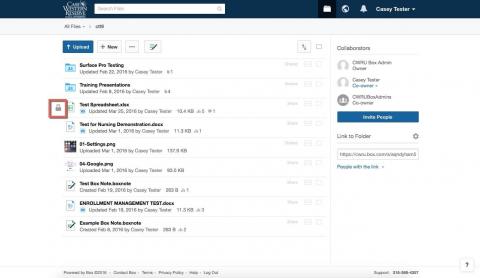
4. The file is now locked. To determine who locked the file, hover your cursor over the padlock icon.
Set an expiration time for a locked file
1. Select file and right click, click Lock File.
2. Select Set an expiration time for the lock.
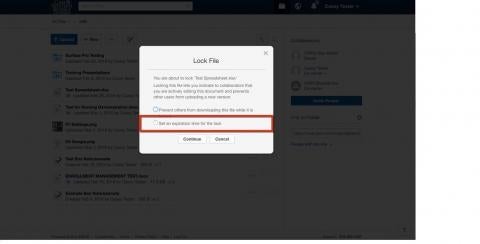
3. From the drop down menu, choose the Duration for which you want the file to be locked.Click Continue.
4. The lock on the file will now expire at the determined time. To determine who locked the file, hover over the padlock icon.
Unlocking a file
1. Right click the file you would like to unlock.
2. Select Unlock File. Your file is now unlocked.
