Zoom unifies cloud video conferencing, online meetings, group messaging and a software-defined conference room solution into one, easy-to-use platform.
Signing Into Zoom Web Portal
Go to case.edu/zoom and click Sign in. From there, log in using CWRU Single Sign-On (SSO).
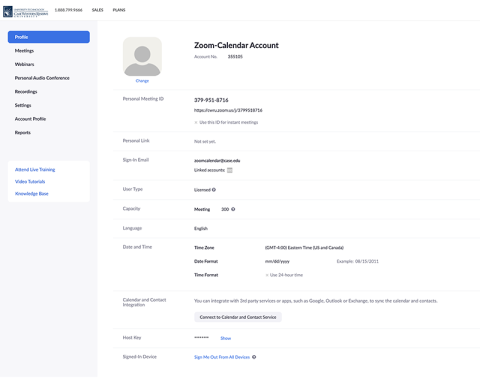
You'll be directed to your Zoom profile page. You may change many of the default settings from this page.
Use The Zoom Desktop Client
Download and install the Zoom Client by visiting zoom.us/download.
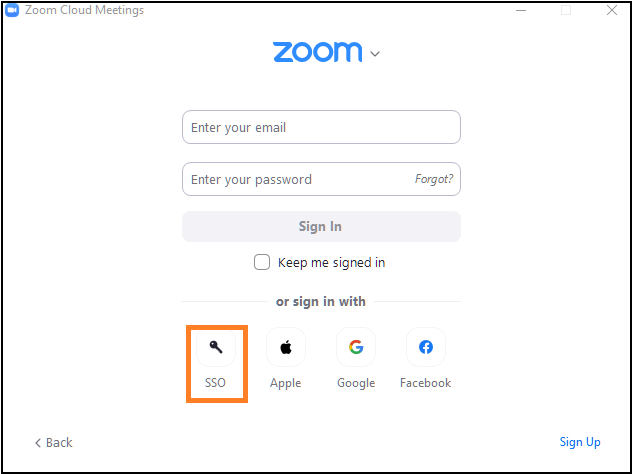
Sign into the client using SSO (Single Sign-On) when using the Zoom client.
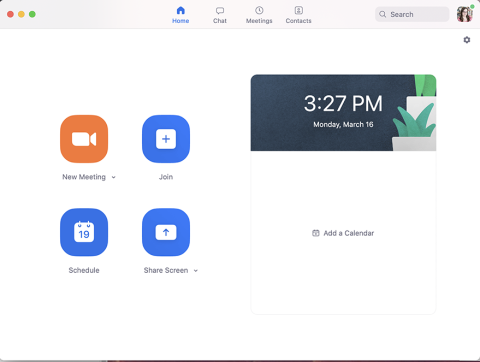
Once you have logged in, you will see the main dialog box as shown below. The default tab is Home.
The app allows you to:
- Click New Meeting to start a meeting
- Click the arrow to the right of the New Meeting text to start a meeting with video on
- Click Schedule to set up a future meeting
- Click Join to join a meeting that is already in progress
- Click Share screen to share your screen to a Zoom Room device using a sharing key, or share your screen to a meeting in progress using the meeting ID.
Note: Click the profile icon to view your profile, check for updates, switch accounts and logout.
Zoom Settings
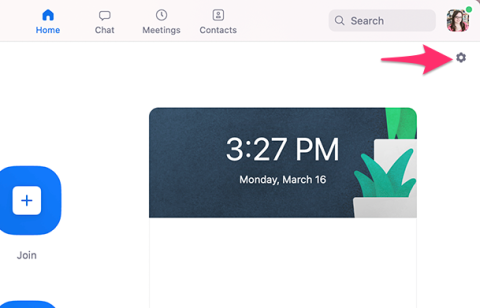
You can find the Settings tab in the main dialog box or in the meeting menu bar. After clicking Settings, the following areas contain the most commonly sought after settings:
- General: Select default preferences
- Audio: Test, select and adjust your speakers and microphone
- Video: Test and select your video camera
- Recording: Browse/open your stored recordings (all recordings are stored on your local device/computer)
Troubleshooting
If you see the image below, select Sign In with SSO. When prompted for the domain, enter cwru.zoom.us. When you are redirected to CWRU Single Sign-On, enter your CWRU network ID and passphrase to continue.


