In order to control storage costs in Zoom, cloud recordings are retained for 150 days in the Zoom web portal. 150 days after a recording is made in Zoom, it will be sent to Zoom’s recording trash for 30 days and then deleted permanently. Here are important things to note about Zoom cloud recordings:
- Any recording made 150 days prior to today will immediately go to the recording trash in Zoom and be retained for 30 days.
- During those 30 days, Zoom users can go to their recording trash and recover any files they would like to keep. Sign into the Zoom web portal, click "Recordings", "Trash", "Recover" for the file in question, then "My Recordings", "More" for that file, and "Disable auto-delete".
- Recordings saved to local hard drives are unaffected by this change.
- All recordings will only record the active speaker by default. You can change this setting to record the gallery view in your account settings. Sign into the Zoom web portal, click "Settings", click the "Recording" tab, check the box for "Record gallery view with shared screen" and, if you do not want the active speaker view, uncheck the box for "Record active speaker with shared screen".
- If you are faculty, you can use the Echo360 Zoom integration to automatically save Zoom recordings in Echo360, which has a 4 year retention policy. Documentation is available for manually and automatically saving recordings in Echo 360.
- You can manually download your recording files from Zoom and store them in various cloud services such as Google Drive or OneDrive.
- To download your recording, go to the Zoom web portal and click the Sign In button. You will be directed to CWRU’s Single Sign-On page where you should log in with your Case ID and password.
- Once you’ve signed in, click on the "Recordings" link on the left side of the page. You will see a list of all your recordings.
- Find the recording you want to download. Click the More button on the right side of the item, and select Download from the list. Your files will be downloaded.

- Once you’ve downloaded your file, upload it to the CWRU-approved storage platform of your choice, such as Google Drive or Microsoft OneDrive.
- Turn off auto-delete for a particular file in Zoom
- Go to the Zoom web portal and click the Sign In button. You will be directed to CWRU’s Single Sign On page where you should log in with your Case ID and password.
- Once you’ve logged in, click on the Recordings link on the left side of the page. You will see a list of all your recordings.
Find the recording you want to save. Click the More button on the right side of the item, and select Disable auto-delete from the list. Your files will not be deleted automatically after 150 days.

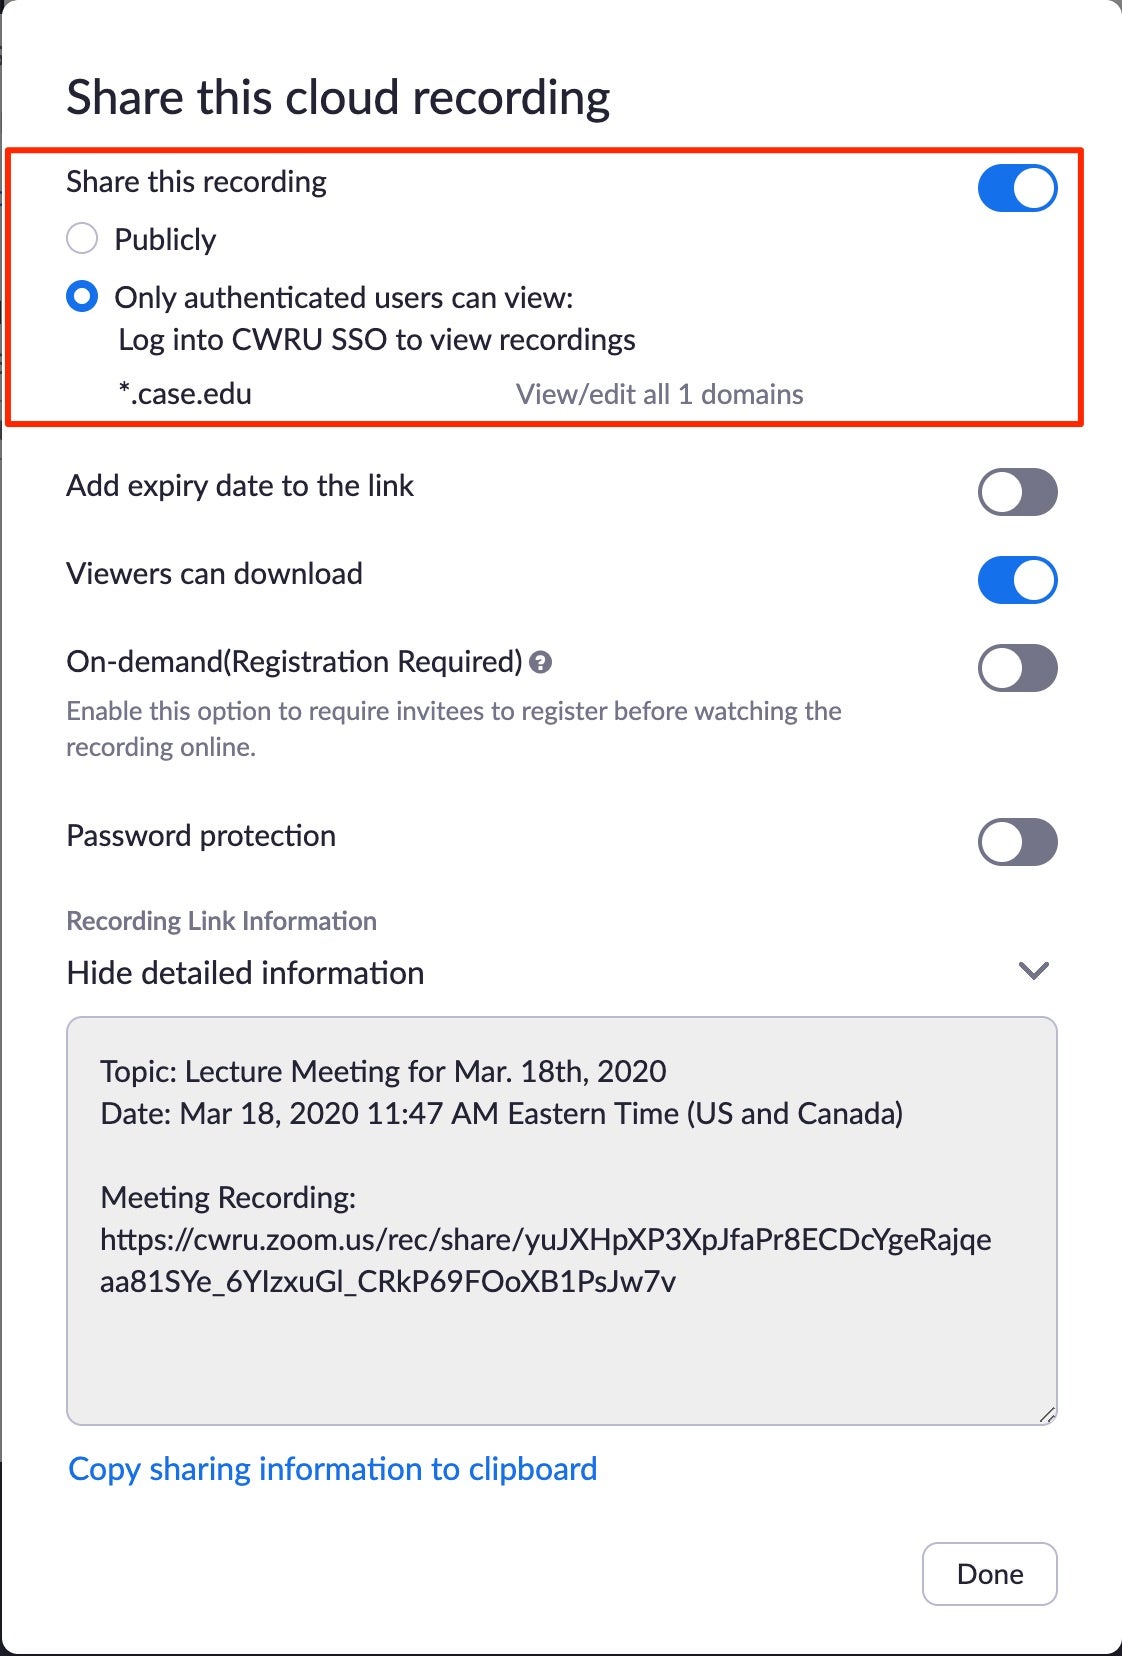
- You can require that a user be logged into CWRU’s Single Sign-On for any recording in Zoom. This setting is now turned on by default.
- To enable the Single Sign-On requirement for any recording, first visit the Zoom web portal and click the Sign In button. You will be directed to CWRU’s Single Sign-On page where you should log in with your Case ID and password.
- Once you’ve logged in, click on the "Recordings" link on the left side of the page. You will see a list of all your recordings. Find the recording to which you would like to limit access and click on the name of the recording.
- On the following screen, click the Share button on the right. A new panel of settings will appear.
Ensure that the toggle is on for Share this recording, and Only authenticated users can view is selected. This will require that users log into CWRU’s Single Sign-On to view a recording. Users outside of CWRU will not be allowed to view your recording.
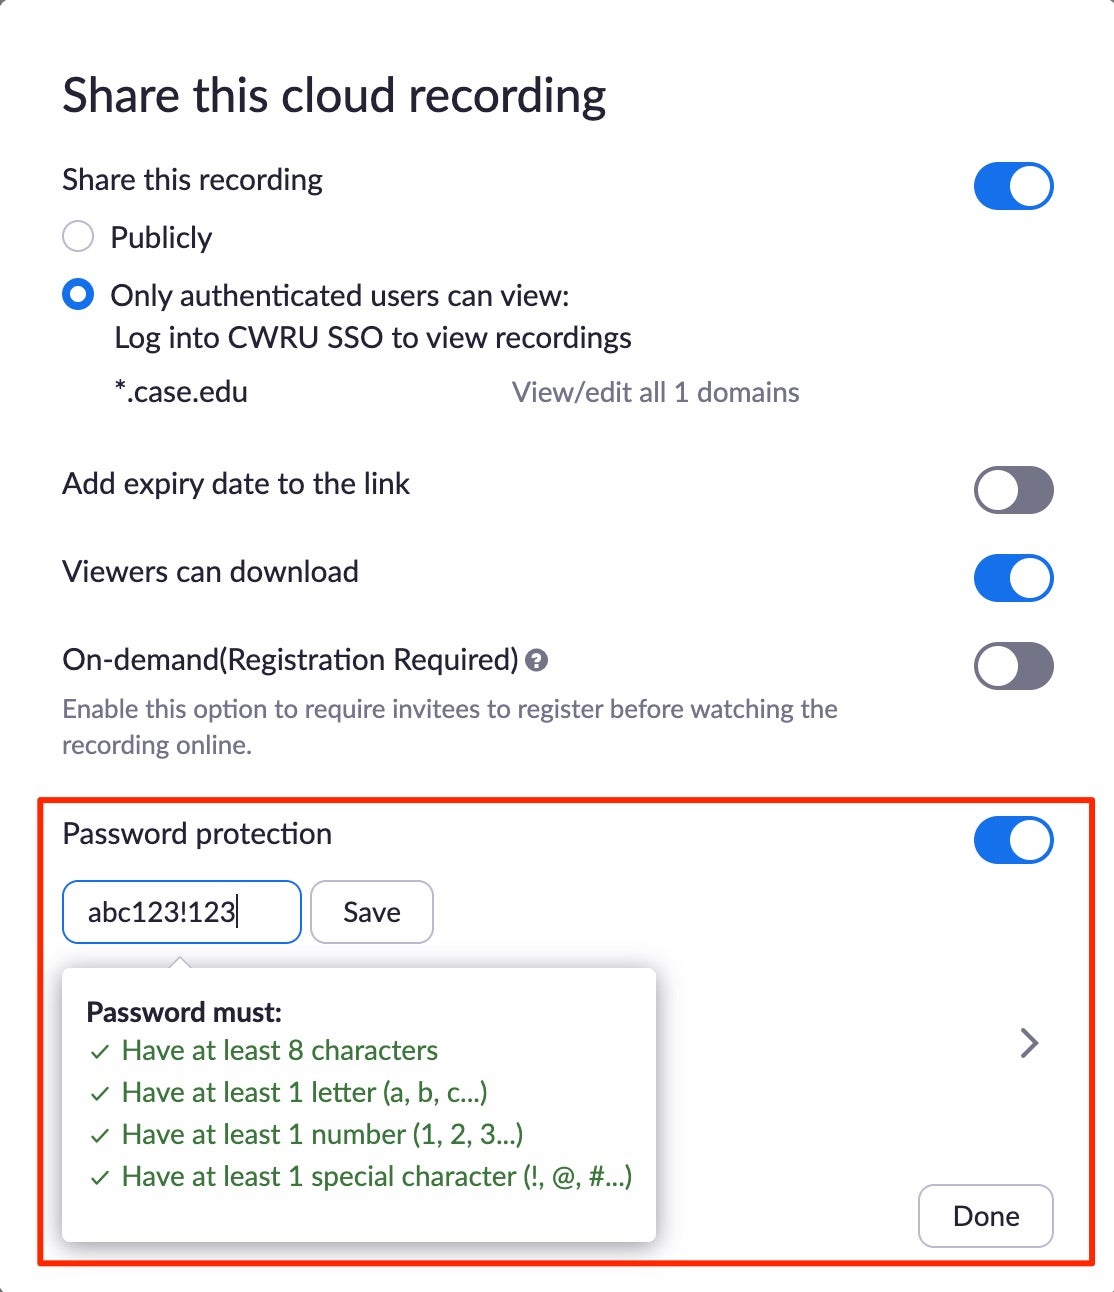
- Set a password for your recording
- To enable a password for any recording, first, browse to the Zoom web portal and click the Sign In button. You will be directed to CWRU’s Single Sign-On page where you should log in with your Case ID and password.
- Once you’ve logged in, click on the Recordings link on the left side of the page. You will see a list of all your recordings. Find the recording to which you would like to limit access and click on the name of the recording.
- On the following screen, click the Share button on the right. A new panel of settings will appear.
- Enable the toggle for Password protection.
- Type in a password that meets the password requirements.
Click the Save button.
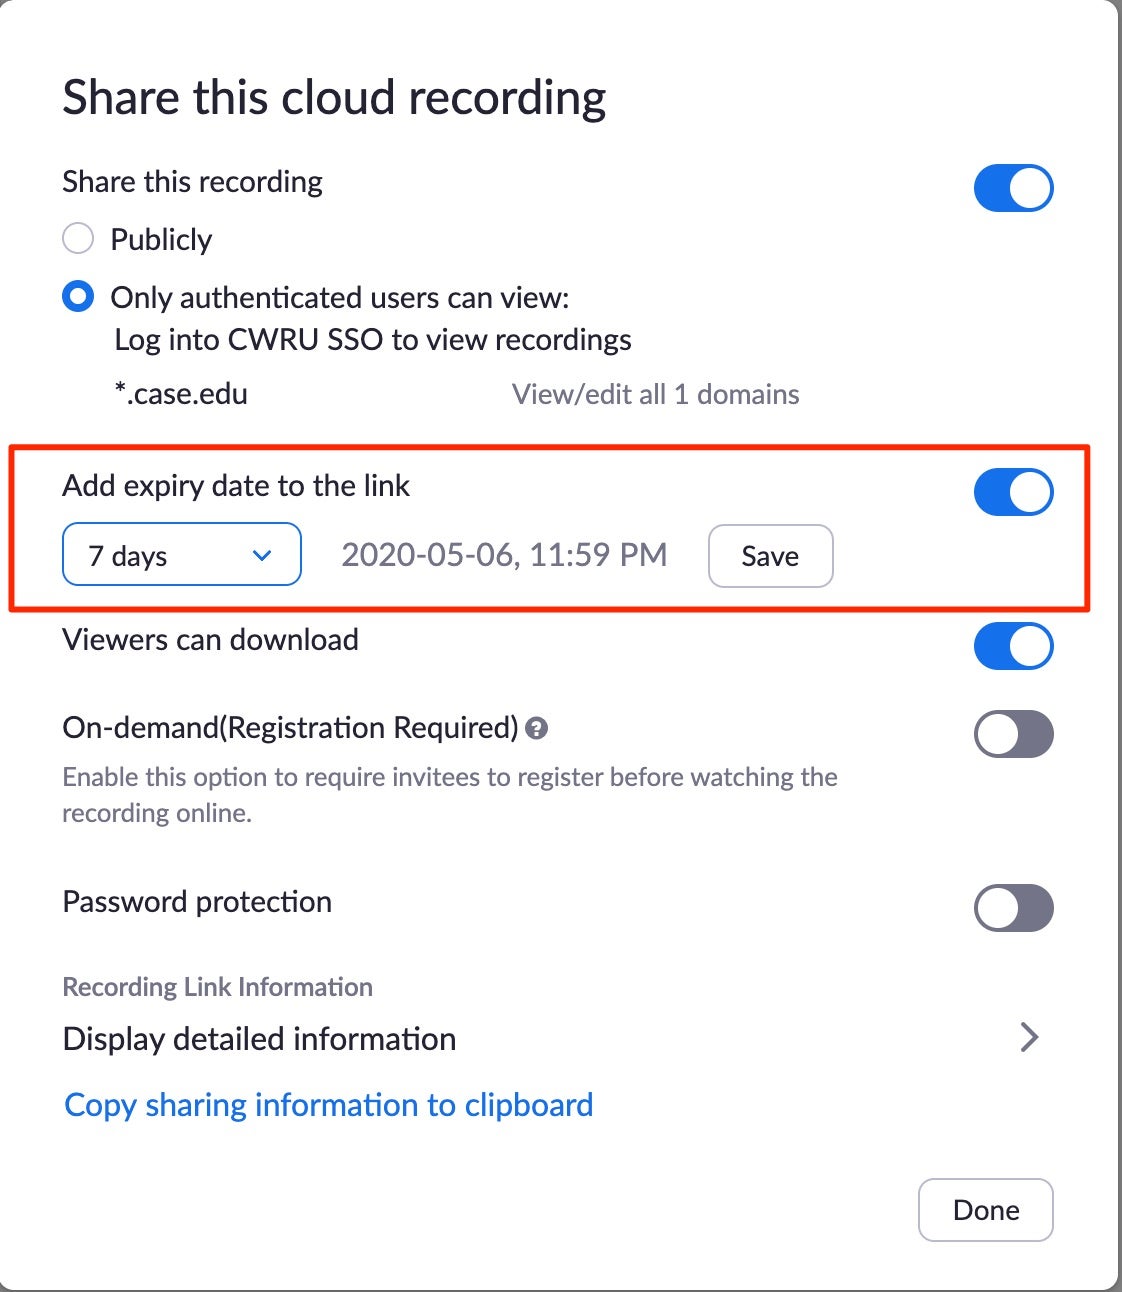
- Set an expiration date for a Zoom share link
- To enable an expiration date for any recording, first visit the Zoom web portal and click the Sign In button. You will be directed to CWRU’s Single Sign On page where you should log in with your Case ID and password.
- Once you’ve logged in, click on the "Recordings" link on the left side of the page. You will see a list of all your recordings. Find the recording to which you would like to change the share settings and click on the name of the recording.
- On the following screen, click the Share button on the right. A new panel of settings will appear.
Click the toggle next to Add expiry date to the link. Set the expiration time frame you’d like.