There are three different ways to connect to the conference room A/V systems in Sears think[box]. This page provides instructions and guidance. Please let us know if you encounter any issues.
Setting Up
First, locate the control panel for the conference room A/V system on the table top. If the control panel screen is black, tap the screen to wake it up. If needed, boot up the system by pressing "Start."
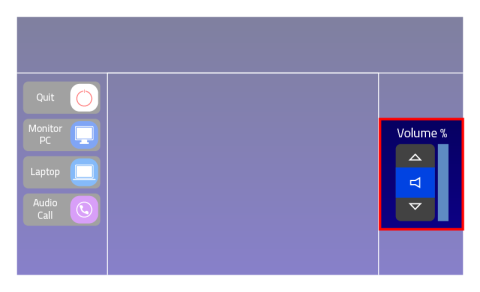
Then, set the volume of the room on the right side of the control panel. The room is muted by default. We recommend setting the volume to 50% and adjusting from there.
Finally, select your input on the left hand side. For video conferencing, use the room's computer. For presentations, you may use the room's computer, HDMI cable, or wireless system.
Present or Video Conference with Room Computer
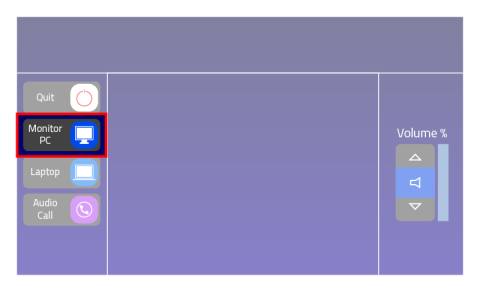
There is a Windows computer built in to the room's A/V system for presentations or video conferencing.
First, set the system input to "Monitor PC."
Then, use the keyboard and mouse on the table top to use the computer.
Finally, when you leave, please log out of all accounts or programs you may have used.
Present with HDMI Cable
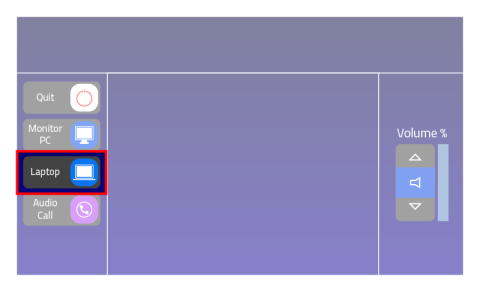
There is an HDMI cable with a variety on dongles on the table top for presentations. If you wish to video conference, please use the room's computer instead.
First, set the system input to "Laptop."
Then, plug the HDMI cable and/or dongles into your device.
Present Over Wi-Fi
The conference room is equipped with a wireless Mersive Solstice display system for presentations. If you wish to video conference, please use the room's computer instead.
First, start by downloading and installing Solstice on your device.
Then, if you have an device running MacOS, follow these instructions to give Solstice permission to share your desktop and audio.
Then, set the system input to "Laptop."
The final step(s) are different depending on who you are:
CWRU Students, Staff, Faculty
First, connect to the CaseWireless wi-fi network.
Then, connect to the display by following the instructions that appear on the conference room display using the IP address listed for CaseWireless.
Finally, refer to these instructions for using Solstice.
Everyone Else
First, connect to the conference room wi-fi (i.e. think[box] 227). Please note, the conference room wi-fi does not connect to the world wide web. If you need to simultaneously connect to the internet and share your screen, please use the HDMI cable or the conference room computer.
Then, follow the instructions on the display using the IP address listed for the conference room wi-fi.
Finally, refer to these instructions for using Solstice.
Troubleshooting
Please check that the devices are switched on. The on/off switches for these devices are usually located near the top right of the keyboard or on the bottom of the mouse.
Check to make sure the HDMI cables on the tabletop are plugged in. Please do not adjust any other cables.
If that doesn't fix the issue, please stop and notify a think[box] staff member so we can troubleshoot the problem for you.
Please stop and raise the issue with a think[box] staff member so we can troubleshoot the problem for you.